After the first few unsuccessful attempts, it becomes more obvious that your biggest enemy in Out There is running out of resources. Many random events encountered throughout the game do not assist you, but instead, cause the game to end quicker. These events can often damage modules and cause you to lose technologies and resources. The best way to combat this problem comes down to properly managing your ship and resources and maximizing efficiency. Also, after taking over a ship, observe carefully which kind of element it uses for fuel, oxygen, hull and repairing spaces and, most importantly, which basic systems it lacks.
Fuel[]
Possible Fuel(s):
- Hydrogen (common for all ships) (2 per unit) and
- Helium (4 per unit) or
- Oxygen (3 per unit) or
- Carbon (4 per unit)
Fuel is no doubt the hardest to maintain out of the three tanks as it is used for almost all tasks in the game. To survive longer, simply obtain and store much more fuel than needed in the cargo area. However, the player must be aware of the need to add more technologies and other resources to the ship later on, and should leave some empty slots.
When travelling to the next star, avoid refueling- if you have enough fuel to make the journey. Random encounters, supply stations, and new ships may give you a windfall of new fuel. Random encounters that occur as you reach the next star can remove some fuel from your tank (e.g. -20), and any fuel that you have added before will be removed. Fuel count will always be a minimum of zero following an event (tanks are never negative). For example, you have 16 fuel. The next event will remove 20 fuel. You are able to add 5 more. If you add it before you travel, you will end up with 1 fuel remaining as you reach the next star (16+5-20=1). However, if you add it after you travel, you will end up with 5 remaining (16-16+5=5).
The only time to completely fill your tank is when you've come upon a rich fuel supply and you need space for all the new fuel.
When refilling the fuel tank, keep in mind that hydrogen is generally less valuable than helium (H: +2, He: +4). Before you drill, make sure you have at enough room for all the fuel you’re about to bring on board—at least two (nearly) empty slots. If you get a huge supply of fuel, you may want to dismantle your drill or probe to keep the fuel. Only do that if you keep a good supply of iron (20+ Iron). Typically you will need a slot for H and a slot for He. If you collect more than one slot full of H, burn that before you start burning He, since it’s denser. But try to keep a little H/He on board in case aliens want it in exchange for Omega. Also, when you got a carbon/oxygen-driven ship, you might want to store the useless helium somewhere else.
Occasionally the Fuel meter fills completely while drilling (most likely only when drilling deeply), so it's not recommended to use up all fuel reserves from cargo before drilling. Instead while you have an Iron stack you can dismantle the Interplanetary Reactor and the Drill, use the gathered elements to rebuild the former again.
Hull[]
Possible Hull(s):
- Iron (common for all ships) (+2 per unit) and possibly
- Thorium (+4 per unit) or
- Cobalt (+5 per unit) or
- Silicon (+5 per unit)
Make sure your hull is over 50% when going to a gas giant unshielded or the gas giant may destroy you. Generally it’s a good idea to to keep two slots of Fe containing at least 30 Fe and the hull between 50% and 70%. It’s a good idea to not fully repair the hull in case a random encounter or supply station repairs it for you. The exception is when you've come upon a big load of Fe and you need room for it all. It's important to have a little Fe or Ti (2-5 pieces depending on the player's preference) in storage in case something breaks.
Visiting a rocky planet is always safe for the hull and they're guaranteed to have at least some(~10) iron, so you can get repairs freely. It's safe to use up all your Iron before drilling even at full depth for the same reason.
Oxygen[]
Possible Oxygen sources:
- Oxygen (common for all ships) (+2 per unit) and possibly
- Silicon (+6 per unit) or
- Platinum (+5 per unit)
20 oxygen and a full tank are all you need for most exploration; more may be needed in enemy space. Garden planets fill your oxygen tank, so it’s common to fly around with a full tank. However, they are uncommon, so when you have to break into your oxygen stores you should start looking for one. As always, when mining oxygen, make sure you have enough room for it.
The Life Seed can be used when low on Oxygen to create a garden planet out of a rocky planet you're at.
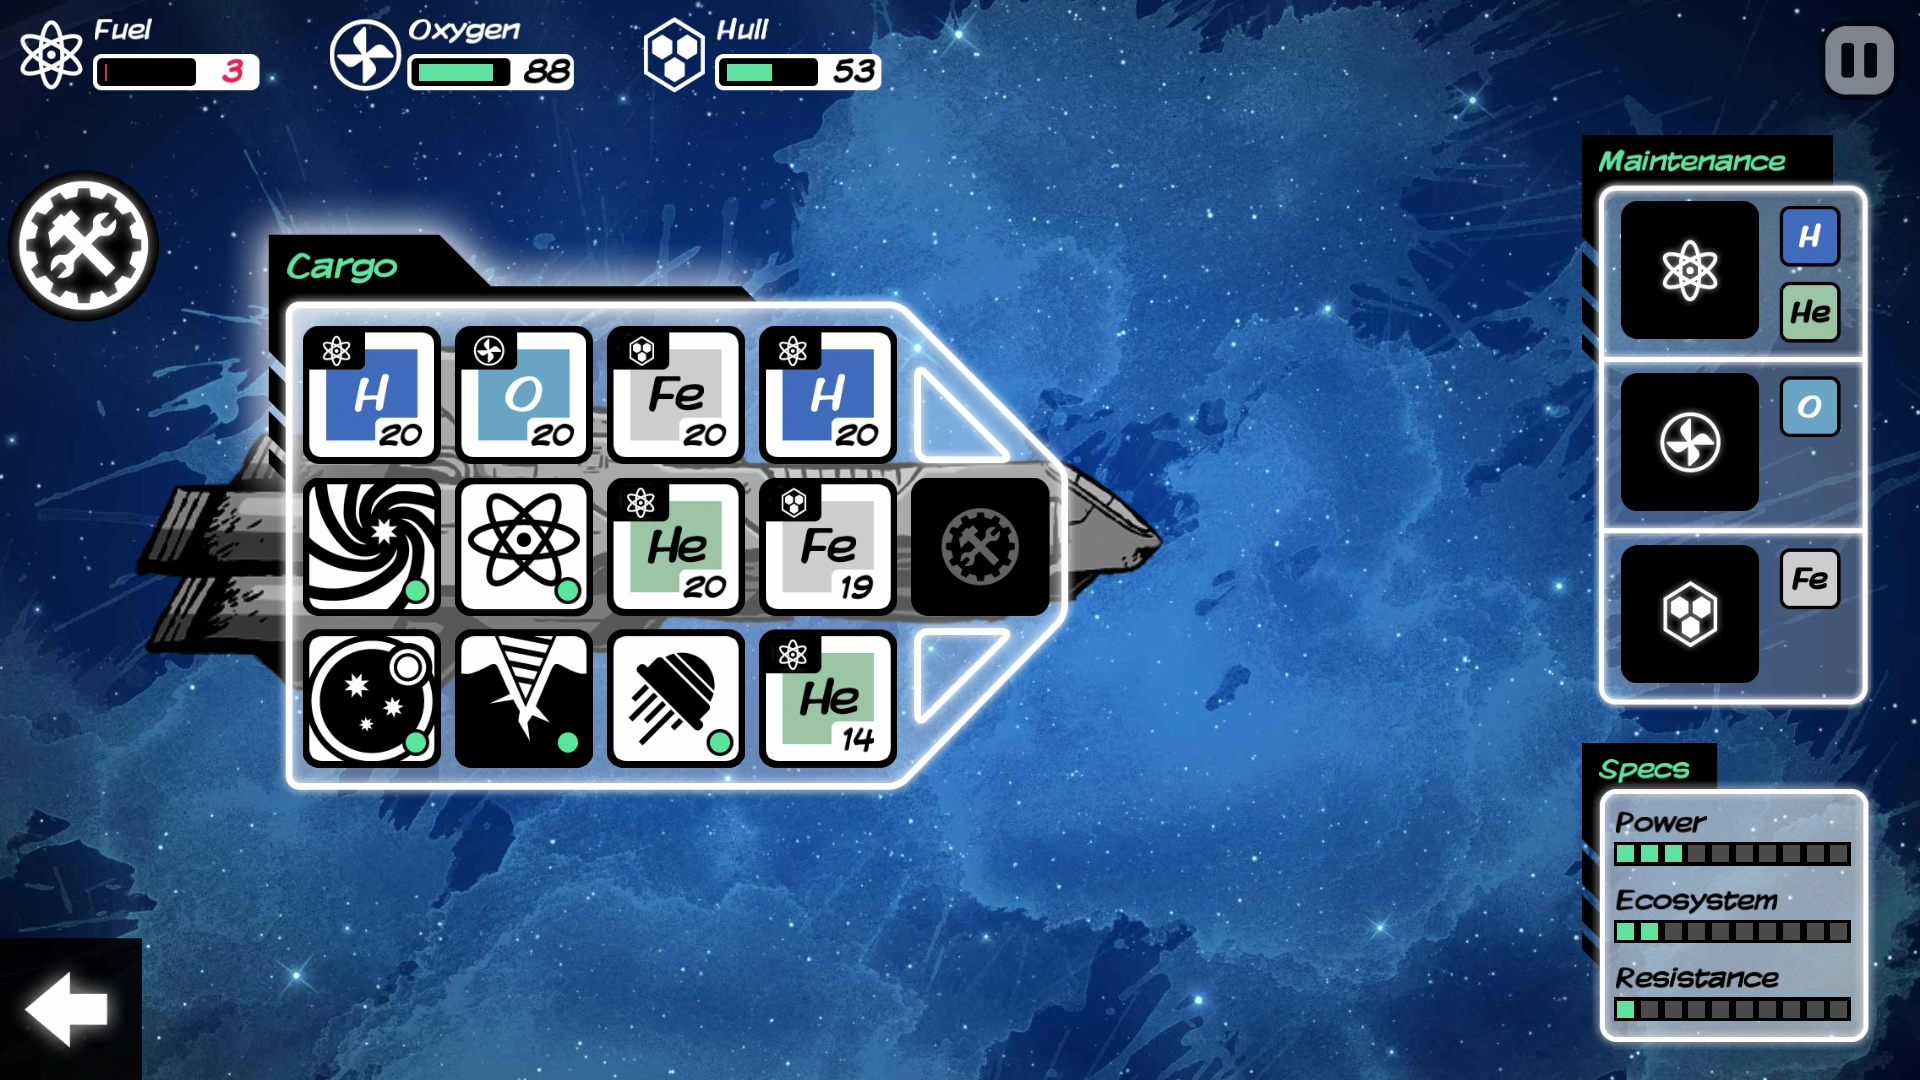
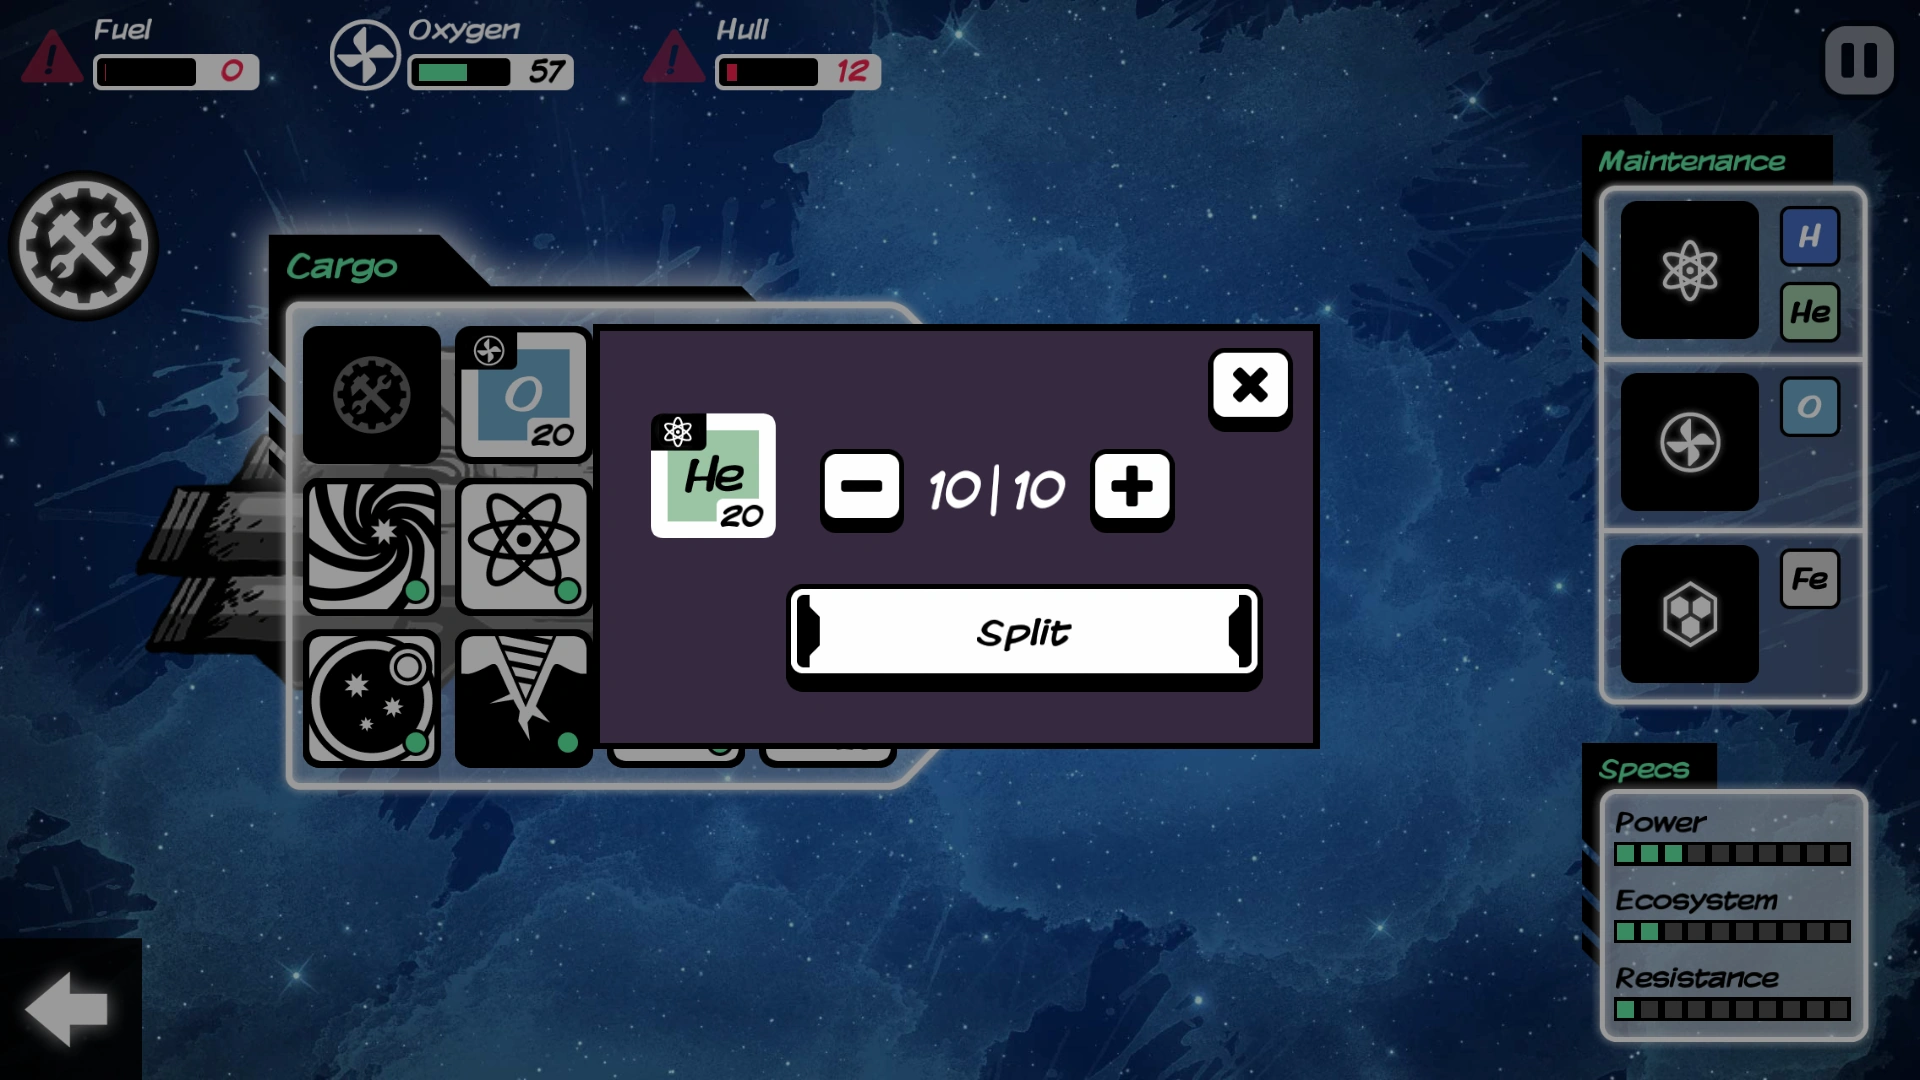
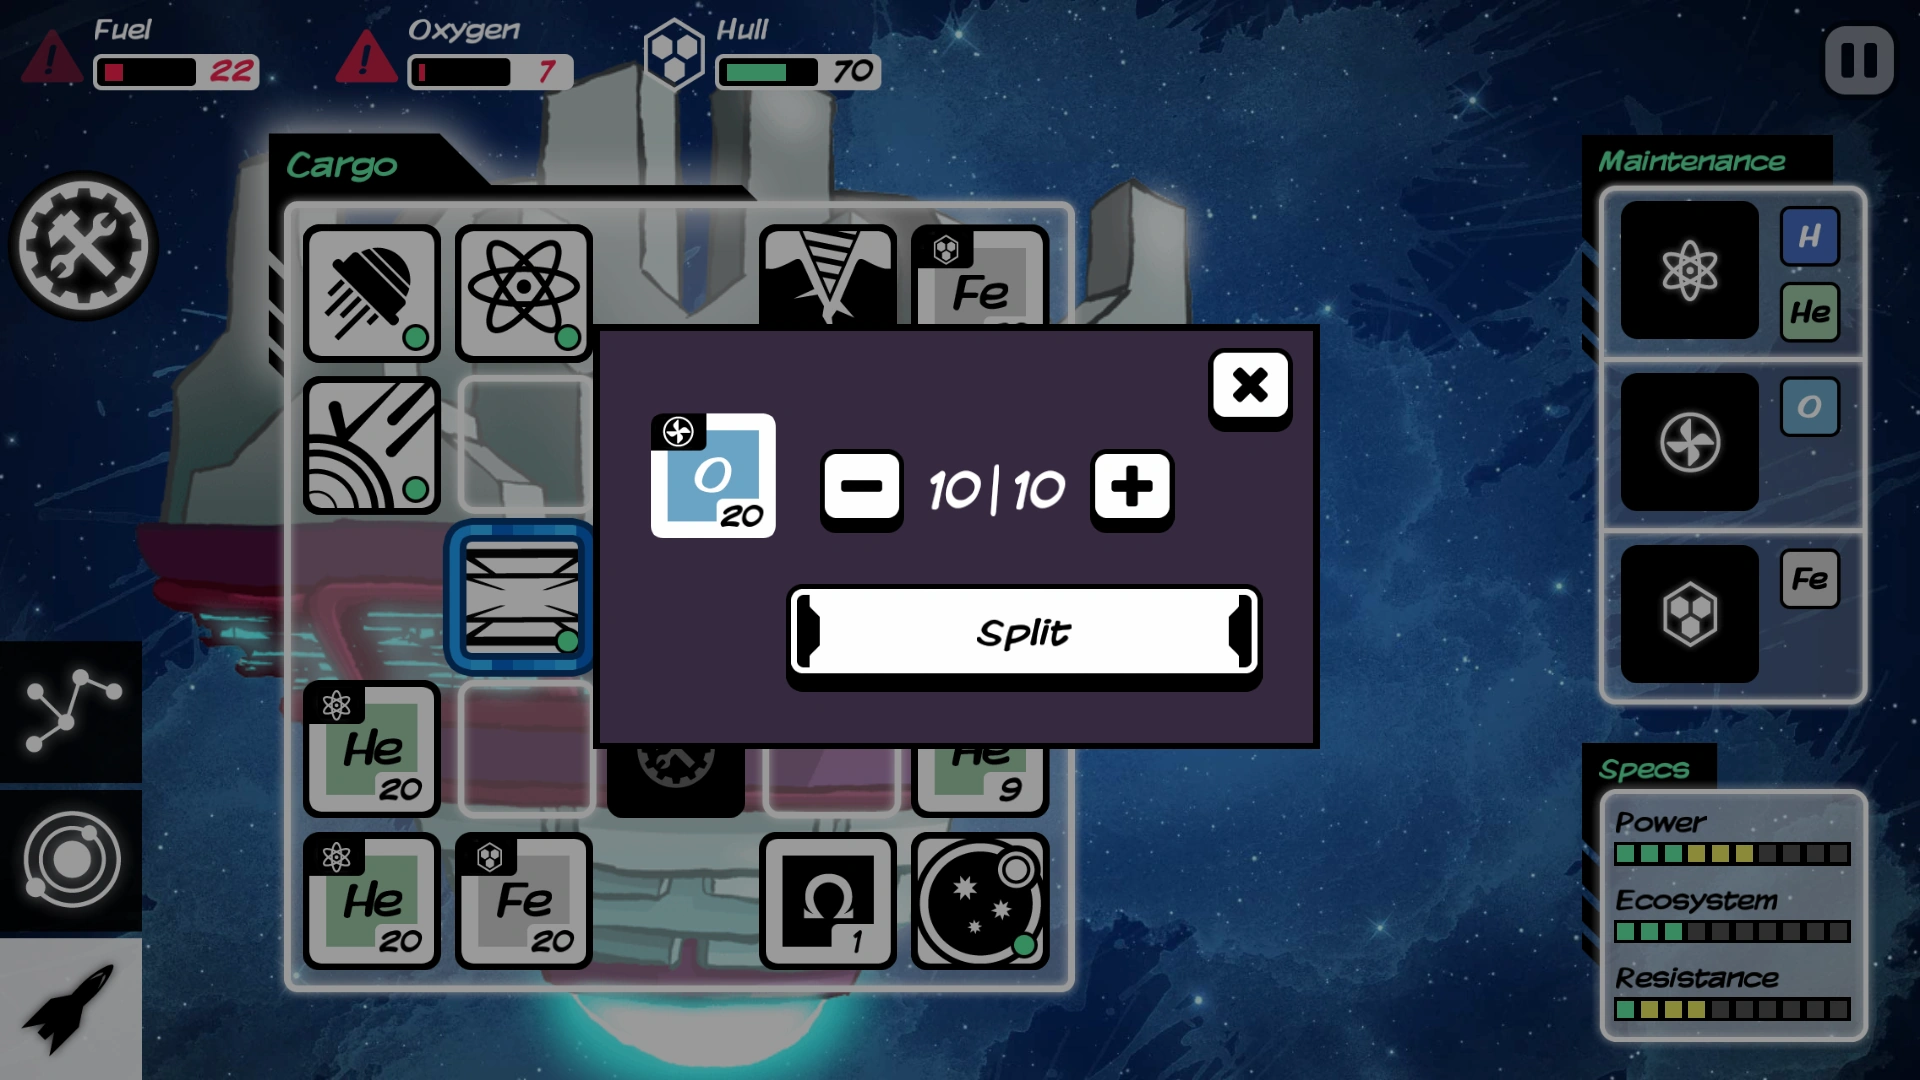
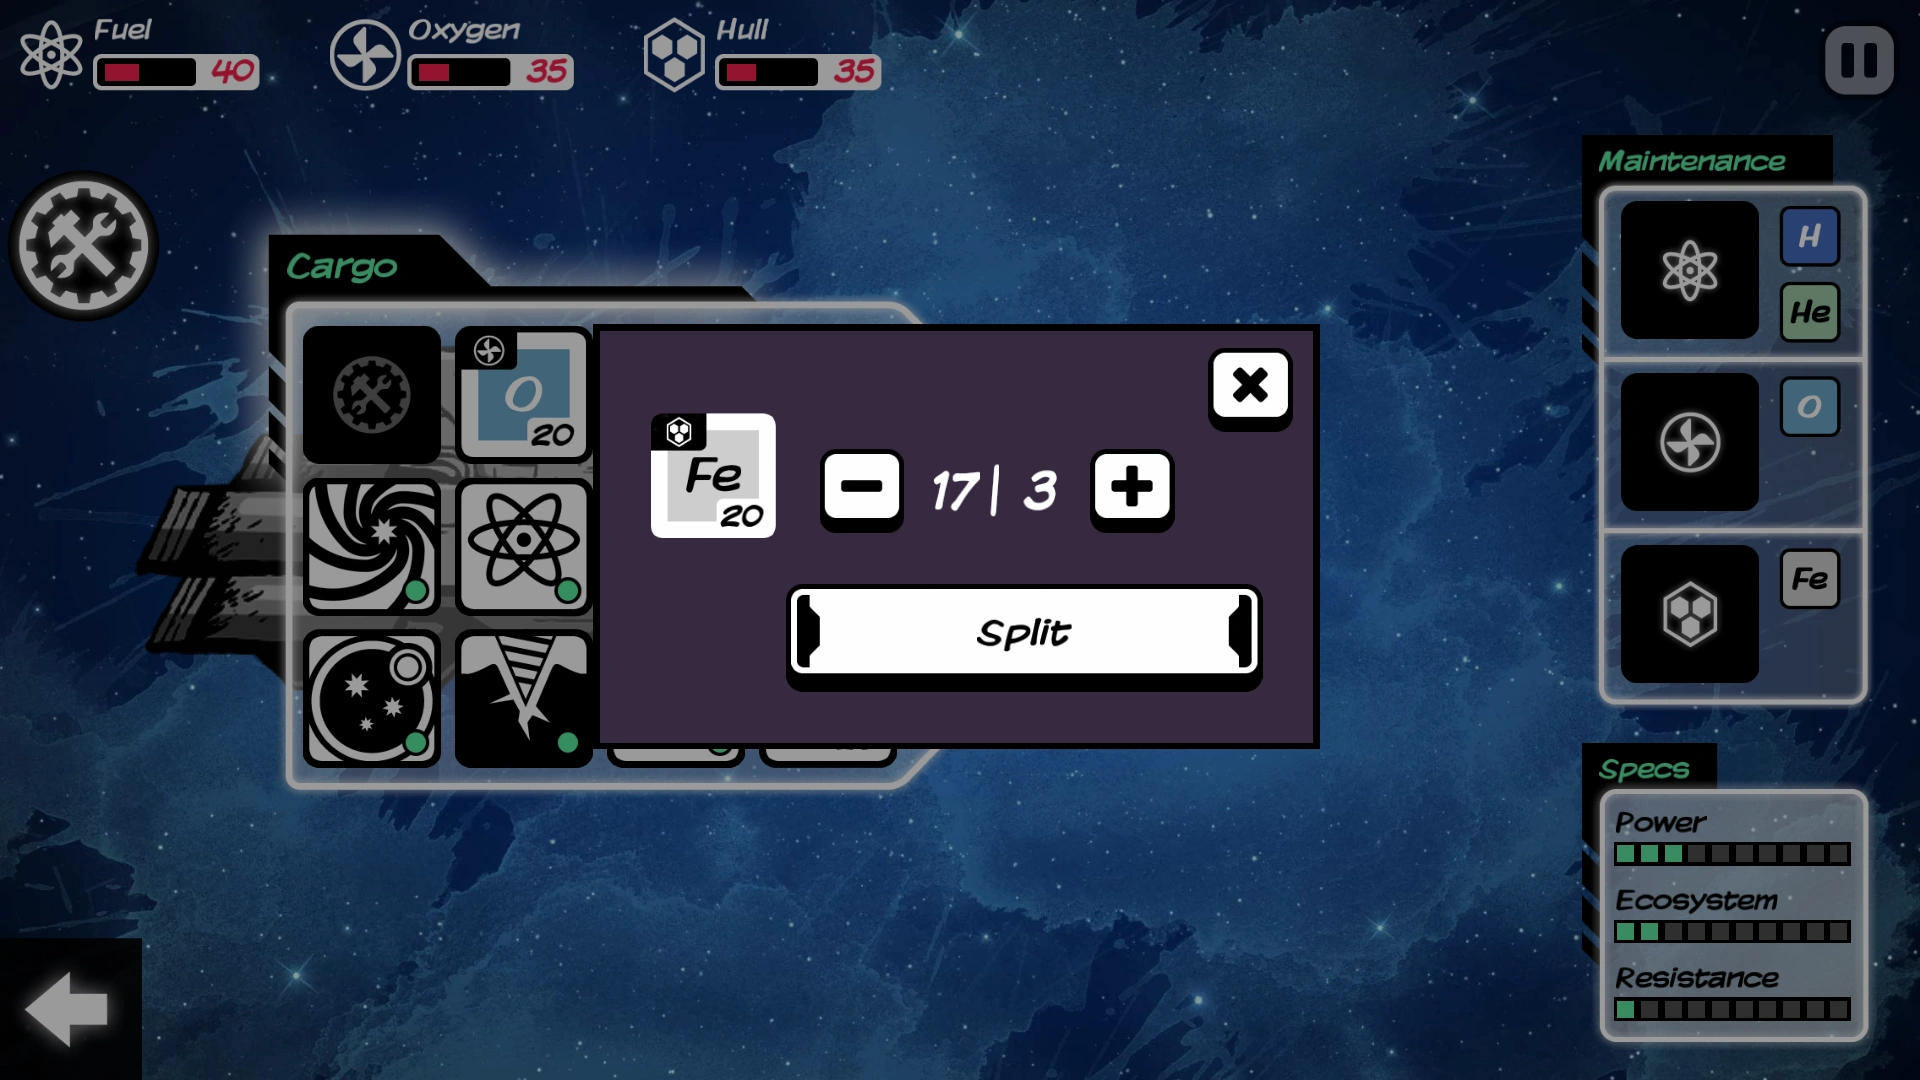
Splitting[]
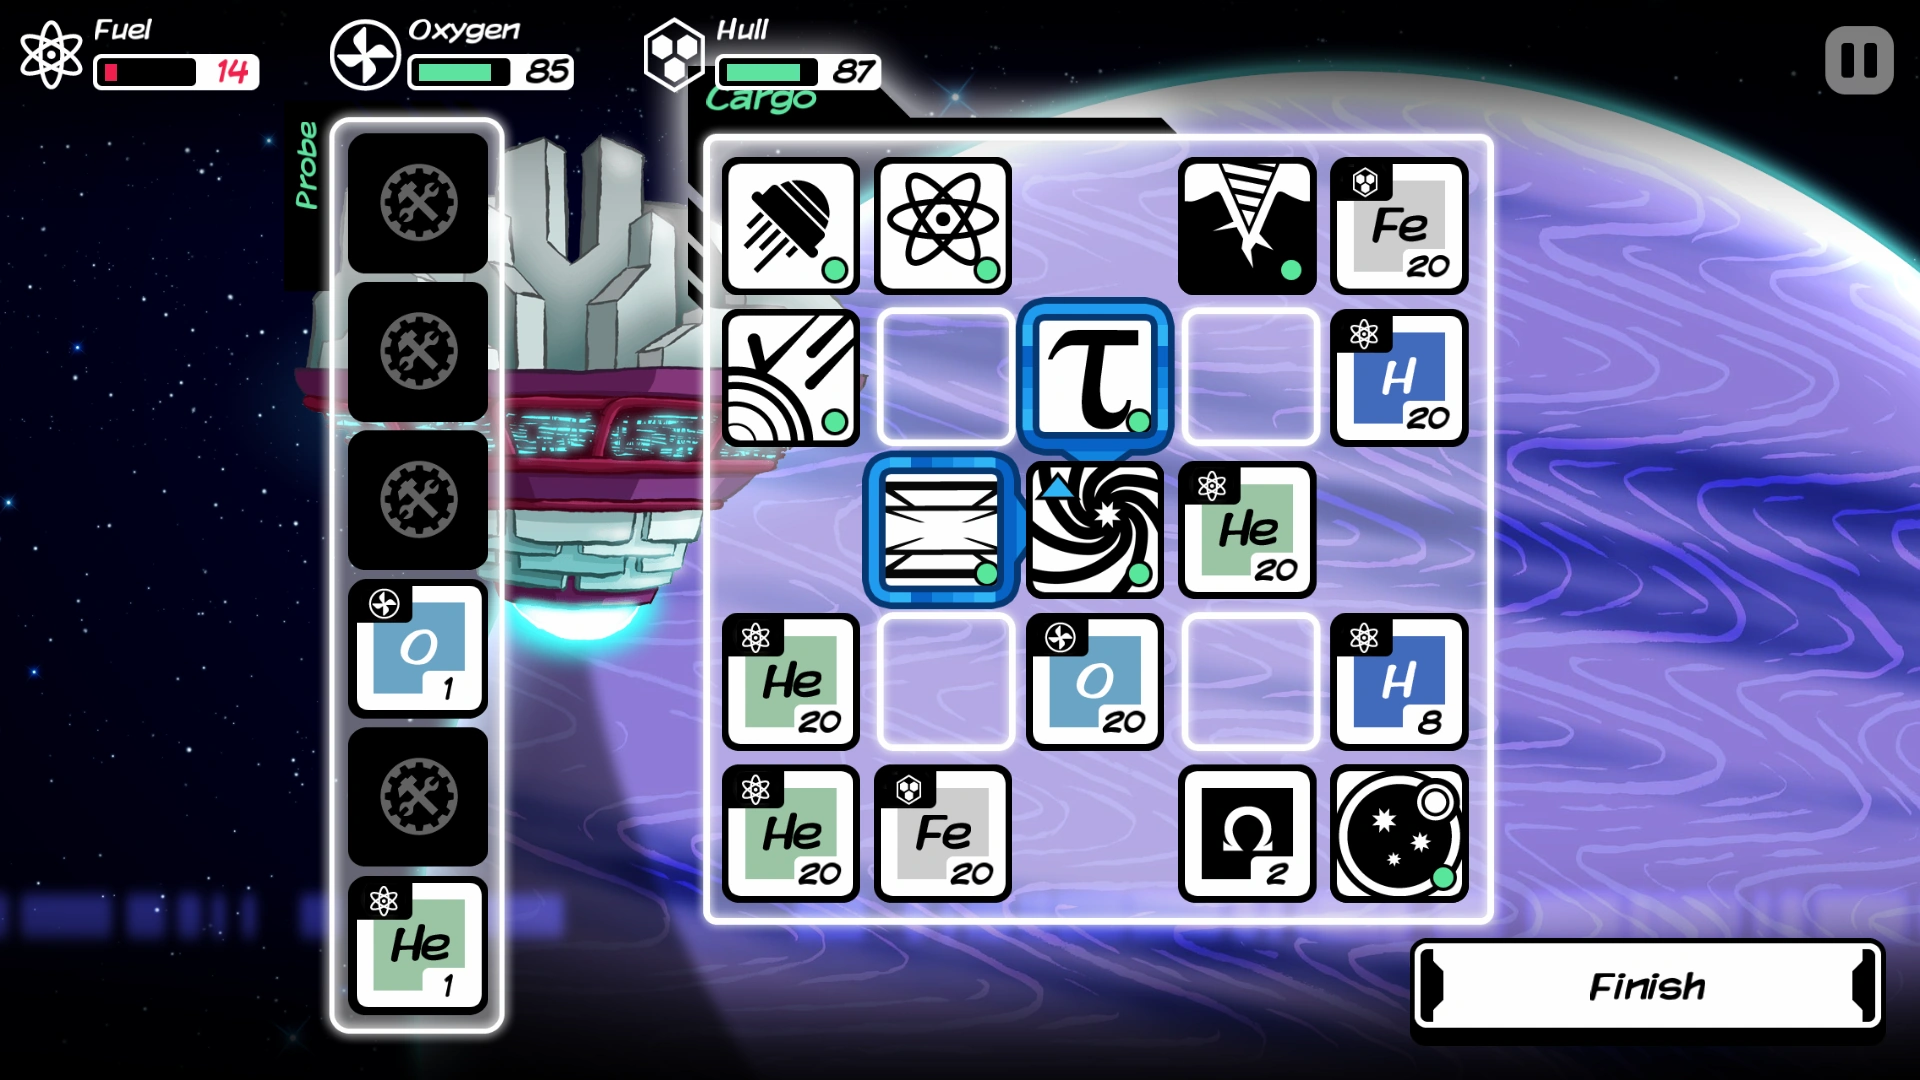
Splitting resources may not seem to be of much use, but however, is the next most important step to survival, especially during emergencies. Tapping on a resource block in your ship allows you to view its information as well as choosing two options: 'Split' and 'Drop'. Splitting helps you manage the ship even better. Although refilling meters up to 100 as often as possible seems like a good idea, filling meters half-full or even less allows you to survive longer. This is again due to the random events that can cause you to lose valuable resources. This technique comes in handy if you are running low on resources in both your tanks and cargo, and especially after being attacked by the alien enemy (blue marker) as many planets will be occupied by them. Splitting is not generally required at the start of the game as stars are closer together and are more accessible.
The splitting technique can be used similarly for both fuel and oxygen as they work similarly (depleting as you travel).
Splitting iron, however, is slightly different. Because most base modules and added techs require iron to fix (which get damaged by random events again), a few iron is best to be kept unused just in case. This is only required if you are down to your last block of iron in cargo and need to repair the hull.

When splitting, keeping at least 2-5 iron (see diagram) is recommended. The remaining iron can all be used to repair the hull.
Also amount to fully fill meter can be not multiple of amount it is filled by resource, so you can lose 2-5 units of it in vain when you dump whole stack.
And of course you should always use only 1 unit of Omega per use in critical emergencies.
Omega Element[]
Other than fixing modules or using it for special techs, the Omega element can be used to refill any of the 3 tanks by +25 points.
This is particularly useful for emergencies and should only be used as a last resort item. Avoid using the Omega element for fixing modules unless necessary (use other elements to fix if possible). This element can be obtained via alien encounters in garden planets and random events. You will almost always lose any Omega in your ship when you get attacked by the alien enemy (blue marker/mission).
With a small ship Omega is mostly used for emergency refills. (Early tech is mostly repairable with Fe and you probably won't have Life Seed, Death Seed, the Wormhole Generator, or the advanced telescopes needed to make good use of the Wormhole Generator.) After the aliens attack and steal your omega, you can consider hoarding it in preparation for these advanced uses. With a big ship you are far less likely to need Omega for refills, but advanced technology is harder to repair. Shield Generator malfunctions are particularly problematic since they require rare elements and make all their upgrades useless. If you want to save Omega for special tech uses, you may want to consider keeping repair ingredients for the shield generator.
If you do not already have a slot taken up by Omega, make sure you clear a slot before making contact with aliens in case they give you Omega, or before random encounters (you could also gain almost any other resource from them, even several at once). Otherwise the omega will not appear in your inventory. It’s also a good idea to make sure you aren't out of Fe or H before making contact since the aliens sometimes want those in exchange for Omega.
Later, Omega is also used for accessing and traversing wormholes. Plan wisely and grab Omega when you are skilled in Galactic language. If you have much patience - you can repeat dialogue with aliens over and over until they ask for element you have and already know.
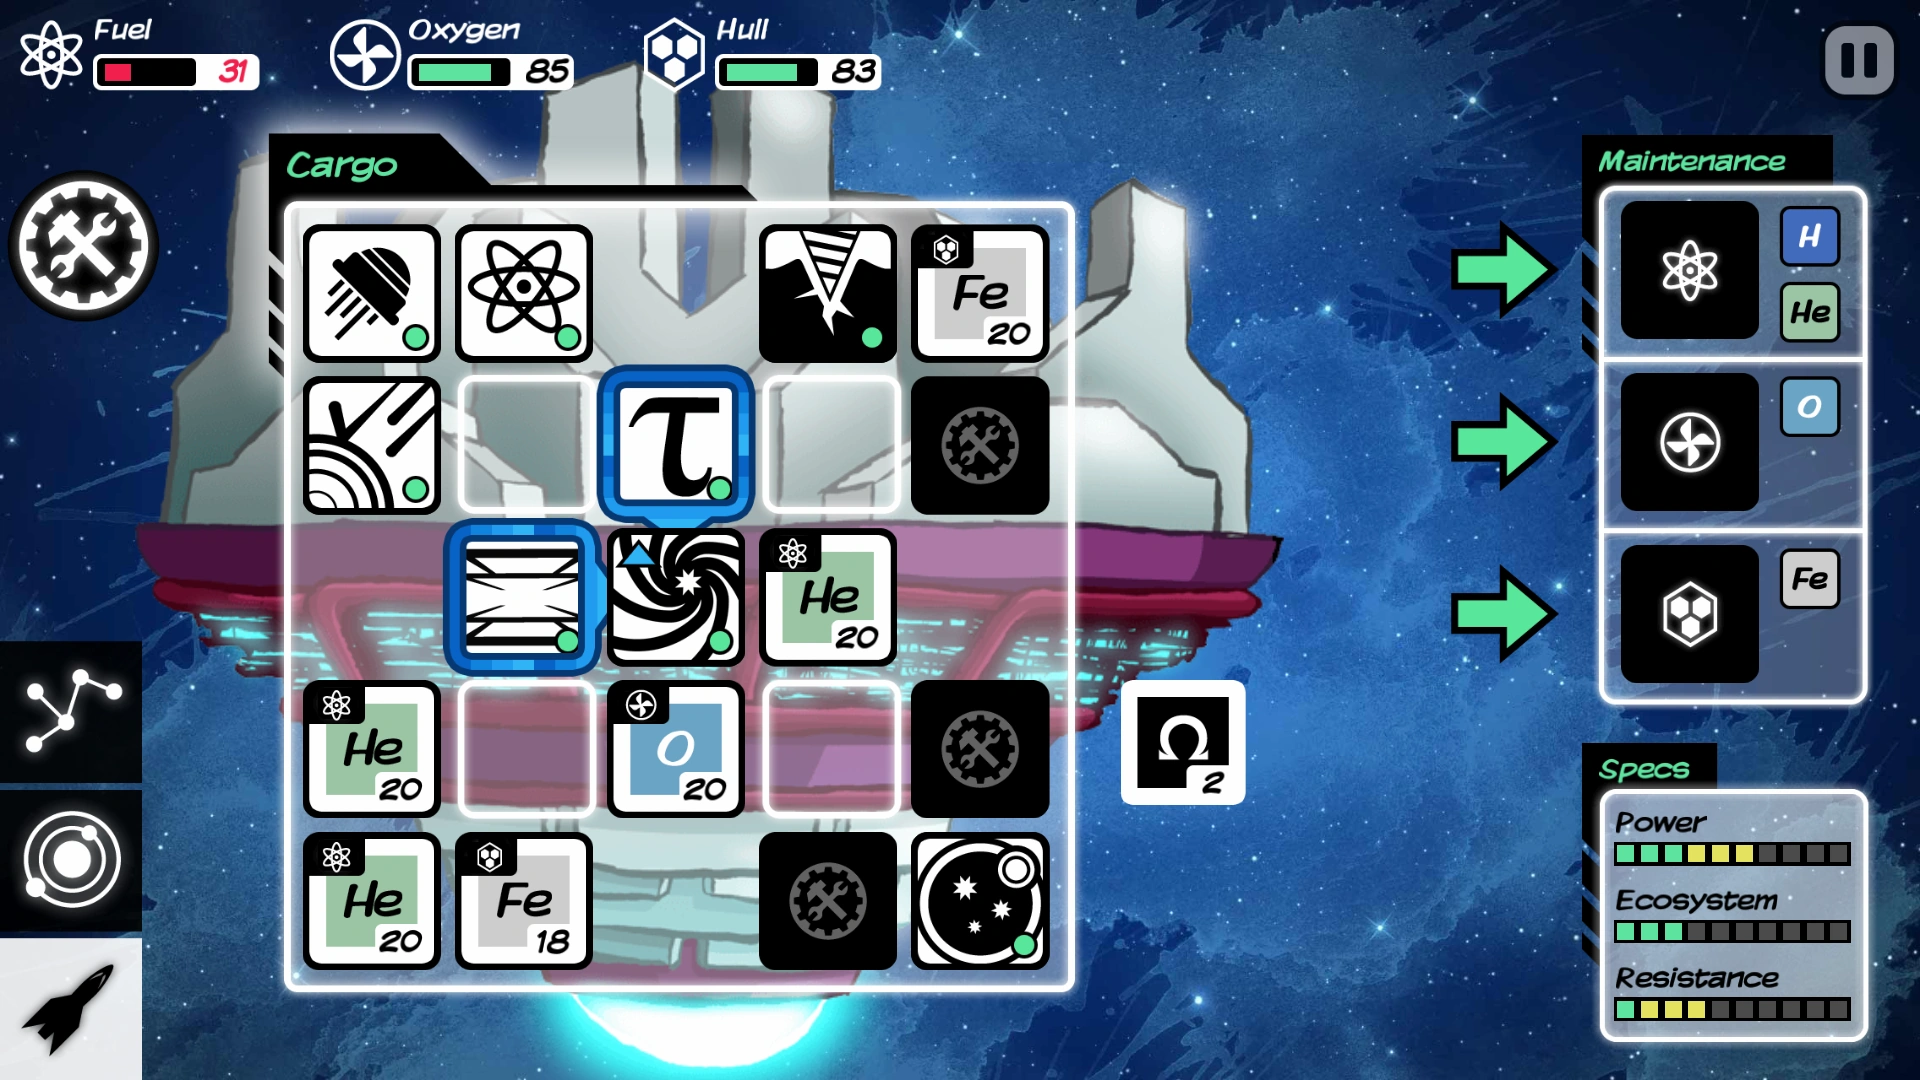
Packing the Ship[]
Space on the ship is one of the main resources and takes careful management. Players must find a compromise between technology modules, essential elements, rare elements, and free space. Keeping a stash of one stack of each important rare element and at least 2 stacks of fuel and hull repair is a good idea. You can dismantle and rebuild about anything for any situation. This provides a lot of flexibility concerning free space on the ship. It is not a good idea to keep too much rare elements if you are on a small ship like the Nomad or Arrow.
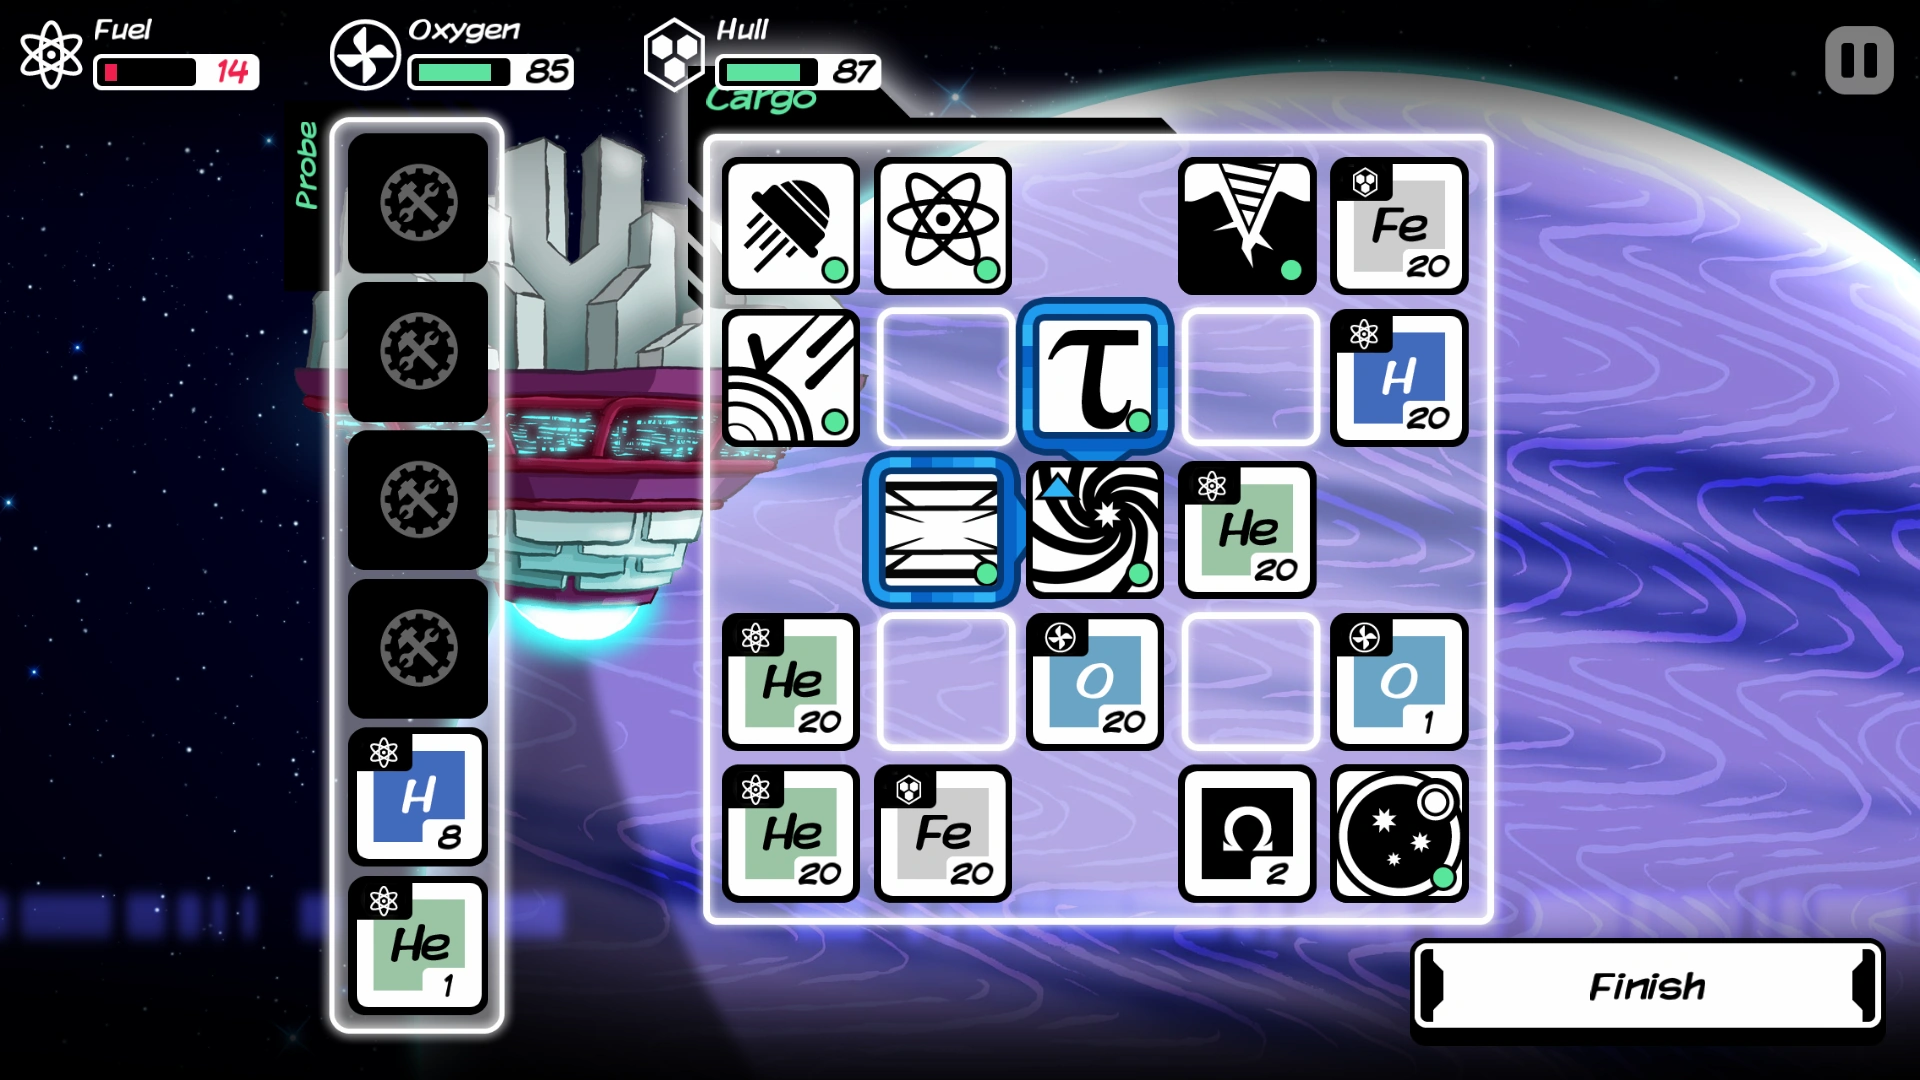
For example: say you have just probed a gas planet and obtained 8 hydrogen and 1 helium, but just realized that your ship is full. Fuel level is low, while the other two are quite full. The best option is to clear the slot with the resource that is the lowest in both quantity and importance (or dismantle your drill or probe), which is the slot with 1 oxygen in this case, by dragging it to the 'Probe' slots. The next step is to replace the 1 oxygen with either the 8 hydrogen or 1 helium. 8 hydrogen refills 16, while 1 helium refills 4. Hence, the best option is to replace the 1 oxygen with the 8 hydrogen.
Strong reserves of essential elements are needed to survive. Rare elements are needed for new technology modules but can take up enormous amounts of space. Technology modules are fun, useful, and improve survivability, but too many will leave too little room for essential supplies on a small ship. Tech is often forgotten and is more compact than its constituent elements, so it's usually best to build tech modules immediately. Tech modules must be arranged properly to maximize upgrades (see Rearranging). Free space is a surprisingly valuable resource since incoming elements need somewhere to go. Make sure you have enough space for incoming resources before mining or contacting aliens. A stack of each element can hold 20 units max in it, so resource stacks with less than 20 items in them can also be useful for space when acquiring same resource type.
The basic set of Tech modules (Interplanetary Reactor, Space Folder, Drill, Hydrogen Probe, Telescope) takes up 5 slots. A minimal supply (2 Fuel, 1 O, 1-2 Fe) takes 4-5 slots. An additional slot should be reserved for Omega.
There is not nearly enough space on the Nomad (11 slots) for a decent set of upgrades and a useful reserve of essential elements (fuel, Fe, and O). The essential elements are more important than shiny upgrades so you may have to let some upgrades wait for a larger ship, which shouldn't be long(but many modules can be used in events which can somewhat compensate for lost space). Rare elements take up precious space, but can be dropped at any time. When you have unused slots, loading up on rare elements is harmless and helps build tech later on. But soon enough you will have to sacrifice some elements to make room for more useful elements and modules. The usefulness of an element depends on what technologies you know and have installed. Keep the elements wiki page handy to help make these valuable decisions. Also keep in mind that some elements are far rarer than others and some have very little use(stocking up on Carbon is generally useless).
Every ship except Arrow, Firefly and Crescent has more space than the Nomad. The Super Rocket is an odd shape and will not allow you to completely fill out all the upgrades of both the Space Folder and the Shield Generator. Space on the ship is such a problem that the largest ship is usually the best one, especially if you have a shield generator and a Space Folder upgrade. The Disc Ship is the largest with 21 slots(though in difficult placement), with Sphere (tree) and Terran ships a close second with 20 slots.
Also, if you need to fill up on more fuel immediately, and you don't have enough space on-board, but you have some Iron on the ship (and you haven't lost the necessary technologies), you can dismantle some Fe-only modules (Interplanetary Reactor and Drill for example), fill up on fuel, and then rebuild them again.. The same goes for other single element modules if you have a spare stack of that element. Plus, you can even dismantle the drill while the drill panel is still open.
Rearranging items[]
Moving modules always comes at a cost. Players should avoid dismantling and rearranging modules around the ship. Rearranging is useful for maximizing upgrades. Dismantling and rebuilding modules is also useful when transferring modules to a new ship. And if the new ship isn't so good, moving a module, using the new ship until it's out of resources, then moving back.
Avoid unnecessary rearranging by planning ahead: place components such that upgrades will fit in later. Remember how much max adjacent upgrades can module have before placing it. Both the space folder and the shield generator make tetris T-shapes when fully loaded with upgrades. The interplanetary reactor uses up at most two adjacent squares, making a L-shape or a 3 blocks in a line. The drill and telescope each can use at most one adjacent square for upgrades. Some modules are relatively easy to move, particularly the Space folder, Interplanetary Reactor, Drill and Hydrogen Probe. If you think you'll have to rearrange modules, move these before your ship gets too cluttered with tech. One scenario where rearranging can be seen in the image below.

Moving to a newly discovered ship is a good time to plan your packing strategy. The new ship will have its modules crammed into one corner. The Space Folder, Interplanetary Reactor, and the Hydrogen Probe are the easiest to move, costing only a little Fe(outdated). The Space folder and Interplanetary Reactor should be immediately moved to more favorable locations, using the Fe from dismantling the old ship. The Hydrogen Probe may also be in the way of something. Rather than just moving the hydrogen probe, find a rich gas giant and push it to the max until it blows up. You then recover the Pt needed to rebuild it as well as some extra fuel.
Remember that pressing 'Finish' removes anything remaining in the 'Probe' slots. This technique applies to drilling as well.
So it's best to move/build everything while drilling/probing or at abandoned ship.
Basic/Critical modules[]
- Required for space travel
- Interplanetary Reactor is critical to land on any planet, but when you have landed it can be dismantled if you have lost Drill and don't have enough iron. After drilling you can rebuild Interplanetary Reactor.
- Same with Space Folder. Dismantling them together can save you if you lost your Drill and all Iron. But the difference is you need some source of Silicon to rebuild the Space Folder, such as a spare stack, Telescope or via drilling (Silicon is uncommon, and as such is not guaranteed without the Geo scanner).
- Required for gathering resources
- Drill (or having stack of Iron) is most critical of all. While you have Drill and can get or are currently at rocky planet - you can rebuild everything (Space Folder with luck/reserves). Events seldomly give Iron, so if you've run out of it - you have to dismantle other critical modules or find a new abandoned ship.
- Hydrogen Probe can be constructed only when needed if you have some spare Platinum and of course Iron. Also it's useful to have some Platinum anyway to drill deeply without fear of losing it(if you have no spare slots and Probe and its' slot get destroyed in the process - you're in dire situation).
- Telescope is purely optional and can be dumped for space, but it is also useful as an emergency source of Silicon in case you need to rebuild your Space Folder (dismantling the Space Folder will not give you Silicon).
Things to have in your cargo bay[]
Approximately in order of importance.
- Having a full stack of Helium (or Oxygen/Carbon on some ships, or at least Hydrogen) can save your life many times. It can refill 80% (Hydrogen: 40%, Oxygen: 60%) of your fuel meter in emergency, so keep one and never use it until you absolutely have to. But if you have to - try to consume it in parts of 5 units.
- Aim to always have a reserve stack of Iron, preferably full, for fixing hull and basic modules (and slots on common ships). You can always drill deeply while having it. If your ship has bad resistance - carry two stacks or a secondary stack of [your ship alternative hull repair element].
- Omega for the most dire emergencies: refilling any meter by 25 units or fixing rare modules. Only use 1 unit at a time. Also useful to create garden planets if you run out of Oxygen.
- Oxygen runs out seldomly in general, so only keep it (or substitute) on ships with bad Ecosystem stat and not having Life Seed and Omega.
- [Your ship slot repair element]. You don't want to lose precious space for too long, especially if it's a rare element.
Jumping to another system[]
- It's recommended to have one or more free slots for Omega or other elements that events can give you.
- You shouldn't have to fill the fuel, oxygen or hull meters completely in case of an event that adds to or takes away from them. Even if any of them drop to 0, you will not die until you try to do an action that tries to decrease them any further. But even with them, some events can still do harm.
- Sometimes you can end up in a dead end, because of a stock Space Folder or just the star layout, check star types and plan your route ahead.
- Having the Telescope, Interferometer and sometimes the Ansible helps greatly with choosing where to jump.
- Jumping to visited systems can't trigger events (needs verification), so some of the above may not apply to them.
- It's safe to visit mission beacons without clicking objects/doing actions that trigger that mission if you're going for another one.
Boarding abandoned ships[]
- Be sure that the new ship either has all the critical modules you need or you have enough resources to build them.
- If it's a ship you lost in a previous game - it will have one meter depleted! Be sure to check by switching to it, opening ship screen and switching back.
- Repair all damaged slots you can before switching.
- Do not drop any resources in space, leave them on your old ship just in case.
- You may want to keep some or all of your modules on your old ship intact just in case.
- If your old ship has enough resources - you may want to explore the system with it before switching.