
Modules (along top row) installed on a ship
Out There has 27 technologies. Learning a technology allows its corresponding module to be installed on any ship, improving the performance of the ship or adding new ship capabilities.
Learning Technologies[]
There are five core technologies: Drill, Hydrogen Probe, Interplanetary Reactor, Space Folder, and Telescope. These core technologies are guaranteed to always be available to the player: they are known at the start of the game, and they are never erased/forgotten by game events. However, even though the core technologies are protected, their modules are not: various game events can cause core modules to be damaged or even destroyed, with potentially catastrophic consequencies.
The sixth technology known to the player at the start of the game is Cryonics, but Cryonics is not a core technology (and in fact is useless by itself) — in particular, Cryonics can be erased by game events.
All other technologies must be learned during the course of the game, in one of the following ways:
- At the end of a successful Alien Conversation
- Landing on a Rocky Planet that contains anomaly
- During Random Encounters (sometimes while simultaneously erasing one or more known technologies)
- As part of certain Objectives. (Note that there are also points in some Objectives where technologies are erased).
"Technologies learned" is one of the statistics shown on the end-of-game summary. Its maximum value is 22 — which is only possible if Cryonics was erased at some point and then relearned; otherwise the maximum value is 21. The game score is increased by 999 points for each technology learned.
Modules[]
Modules can only be installed on a ship if the corresponding technology is currently known by the player, and if the required resources are currently available in storage on the target ship. Modules can be installed in any empty storage slot.
Some modules act as upgrades to other modules, which is generally indicated by "Required" in the in-game module description. In most cases the upgrade modules do nothing unless the required module is also installed. Furthermore, the upgrade modules tend to be more effective if the two modules are installed in adjacent storage slots. Blue-colored animation in the ship display connects two modules whenever they are considered to be adjacent. The exact benefits of adjacency depend upon the specific modules and vary widely: at one extreme, a Supra-Conductor is useless unless adjacent; at the other extreme, Gravitational Sails and Solar Sails benefit in no way from adjacency.
Modules can also be found already installed on any discovered space ship. Discovered ships are are most likely (but not guaranteed) to contain the five core modules. They can also contain a random number of other modules, even if the player does not know the technology. (The only modules that are never found installed on discovered ships are Stellar Embryo and Symbiotic Extension.) The player can not learn a technology from a module, nor can the player move the module between ships. However, if the player flies the new ship the module will be fully functional regardless of whether the technology is known.
Modules can be damaged during the game, generally as a result of Random Encounters; resource extraction modules can also be damaged by overuse (Drill, Hydrogen Probe, Planetary Expander, or Ultraprobe). When damaged, the module is no longer functional; specific resources must be used to repair the module. Modules can be repaired even if the technology is not known. More rarely, modules can be completely destroyed, in which case the resources(s) identified under "Dismantle" are added to the player's inventory (if storage space is available). A destroyed module can damage the storage slot where it was located. Also the player can intentionally dismantle any module, recovering the listed resources.
A secondary benefit of most modules is that additional responses to Random Encounters are unlocked if specific modules are installed. As a result, well-equipped ships are less likely to be damaged by random events, and instead are more likely to receive bonus resources.
Overview[]
All 27 technologies are summarized in the following table. Included in the summary are the resources necessary to Build the module, the resources returned if you Dismantle the module (or if the module is destroyed), and the resources necessary to Repair the module when damaged. The Core column identifies the five core technologies that are never forgotten/erased. The Requires column lists any other module that is necessary for the module to be functional (regardless of whether or not it is listed as Required by the in-game description). A required module is listed in boldface if installing the two modules adjacent is beneficial.
| Name | Build | Dismantle | Repair | Core | Category | Requires | |
|---|---|---|---|---|---|---|---|

|
Drill | 4 |
1 |
1 |
Y | Resources | |

|
Hydrogen Probe | 2 1 |
1 |
2 |
Y | Resources | |

|
Interplanetary Reactor | 3 |
2 |
1 |
Y | Power | |

|
Space Folder | 3 1 |
2 |
1 |
Y | Power, Jump Distance | |

|
Telescope | 1 1 |
1 |
1 |
Y | Detection | |

|
Ansible | 2 1 1 1 |
1 1 |
2 |
Detection | Telescope | |

|
Cryonics | 3 1 |
1 |
1 |
Ecosystem | ||

|
Death Seed | 1 1 1 1 |
1 |
1 1 |
Other | ||

|
Geo Scanner | 1 1 |
1 |
1 |
Detection | ||

|
Gravitational Lens | 2 1 1 |
1 1 |
2 |
Detection | Telescope | |

|
Gravitational Sails | 4 |
2 |
1 |
Power | Interplanetary Reactor | |

|
Gravitational Well Generator | 3 1 1 |
1 |
1 |
Power, Jump Distance | Space Folder | |

|
Interferometer | 2 1 1 |
1 |
1 |
Detection | Telescope | |

|
Life Seed | 1 1 1 |
1 |
1 1 |
Other | ||

|
Planetary Expander | 3 1 |
1 |
1 |
Resources | Drill | |

|
Shared Cryonics | 1 1 1 |
1 |
1 |
Ecosystem | Cryonics | |

|
Shield Generator | 2 2 2 |
1 |
2 1 |
Resistance | ||

|
Solar Sails | 2 |
1 |
2 |
Power | Interplanetary Reactor | |

|
Stellar Embryo | 1 1 2 1 |
1 |
N/A | Other | ||

|
Subspace Reactor | 4 |
2 |
1 |
Power, Jump Distance | Space Folder | |

|
Supra-Conductor | 3 |
1 |
1 |
Resistance | Shield Generator | |

|
Symbiotic Extension | 5 5 |
1 |
1 (+3-7 |
Other | ||

|
Tau Stasis | 6 |
1 |
1 |
Power, Jump Distance | Space Folder | |

|
Thermal Resonance Generator | 1 1 1 |
1 1 |
1 |
Resistance | Shield Generator | |

|
Ultraprobe | 2 1 1 |
1 |
2 |
Resources | Hydrogen Probe | |

|
Void Fluctuation Projector | 1 2 2 |
2 1 |
1 |
Resistance | Shield Generator | |

|
Wormhole Generator | 1 1 1 1 |
1 1 |
1 1 |
Other | Telescope |
Detection Modules[]
Telescope[]


- Built using: 1
 1
1 - Dismantling yields: 1
- Repaired using: 1
The telescope is a core technology that displays the type of star (e.g., Neutron Star, Black Hole) for nearby stars. All other detection modules (except for the Geo Scanner) augment the telescope. However, only the Gravitational Lens benefits from being placed adjacent to the telescope.
The default range of a a telescope is 3 IU (Interstellar Units, where 1 IU is defined as the range of a non-upgraded Space Folder). Three modules increase the range of the telescope:
- Gravitational Lens: increases range by 3 IU if adjacent to the telescope; otherwise, the increase is 2 IU.
- Wormhole Generator: increases range by 2 IU (regardless of where it is installed).
- Subspace Reactor: increases range by 1 IU, but only if the Subspace Reactor is installed adjacent to the Space Folder.
These effects stack, so the maximum possible range of a telescope is 9 IU. However, on ships where adjacency is not possible, the maximum range is only 7 IU.
Although the Telescope is considered to be a core technology, it is not essential for gameplay. The only travel method that requires a telescope is wormhole jumping. On interstellar jumps, not having a telescope means that the star type is unknown when jumping into a new star system. However, the star map is sometimes buggy immediately after a telescope is dismantled — the star map might initially only show an overly small region of the map, and might not allow the map zoom to be altered.
The "God-Emperor" achievement requires the player to "build a telescope and its 2 upgrades", where the 2 upgrades are a Gravitational Lens and Wormhole Generator.
Ansible[]


- Built using: 2 1 1 1
- Dismantling yields: 1 1
- Repaired using: 2
The anisble is a module that adds information to the Telescope display about whether the enemy is occupying planets orbiting remote star systems. Although an ansible is only useful if a Telescope is also installed, the ansible does not list Telescope as a required module, and it does not benefit in any way from being installed adjacent to the Telescope.


Telescope display when ansible is installed, for a stellar system with no enemies
When an ansible is installed, an extra line of information is added to the telescope popup shown when clicking on a remote star system. The extra line reads "Safe" (in green) when there are no occupied planets in the remote star system. It reads "Hostile presence" (in red) if at least one planet in the remote star system is occupied by the enemy (and therefore cannot be visited). However, "hostile presence" does not imply that all planets in the system are occupied. The ansible provides no information on how many planets or which types of planets are occupied.
An ansible only becomes useful after the player has encountered the PEOPLE DEATH (revealing the Blue Objective). Using an ansible before that point will always show that star systems are "Safe" — but that status is likely to change (even for previously visited star systems) after PEOPLE DEATH are encountered.
Geo Scanner[]


- Built using: 1 1
- Dismantling yields: 1
- Repaired using: 1
A Geo Scanner module provides information about a planet's resources and anomalies. It is the only detection module that functions indepdently from the Telescope.


Geoscan display, showing that planet contains 11-49 Iron, 11-24 Tungsten, and 1-9 Platinum. There is also an artifact, indicated by "Anomaly detected!"


Geoscan display for an empty planet, after all resources have been extracted
When a Geo Scanner module is installed, the option to "Scan" a planet is added whenever a ship is in orbit around a planet or star. Scanning provides a list of the resources currently available from the planet/star, with a hint at the resource quantities: a red "-" symbol means 1-10 total units of the element; a green "+" symbol means 11 or more total units. If the planet has already been drilled/probed, the Geo Scanner data will be reduced accordingly; the scan result is empty if all resources have been extracted.
The Geo Scanner output also states "Anomaly detected!" if there is an artifact on the surface of a Rocky Planet; landing on such planets will allow the player to learn 1 new technology.
The Geo Scanner does not provide any information about lifeforms on the planet. In particular, it does not tell the player when an Emissary is found on a Rocky Planet.
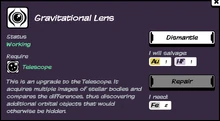
Gravitational Lens[]


- Built using: 2 1 1
- Dismantling yields: 1 1
- Repaired using: 2
Installing a Gravitational Lens increases the range of the Telescope. The range is increased by 3 IU if the Gravitational Lens is adjacent to the Telescope, or 2 IU if it is not (where 3 IU is the range of a non-upgraded Telescope).
Interferometer[]


- Built using: 2 1 1
- Dismantling yields: 1
- Repaired using: 1


Telescope display when interferometer is installed, for a stellar system with one of each planet plus one anomaly
The interferometer is a module that adds information to the Telescope display about the type and quantity of planets orbiting remote star systems. It also lists the number of anomalies, which may be space ships or space stations. Although an interferometer is only useful if a Telescope is also installed, the interferometer does not list Telescope as a required module, and it does not benefit in any way from being installed adjacent to the Telescope.
Note that "anomaly" has a different meaning for the Interferometer than for the Geo Scanner; the Interferometer has no ability to detect artifacts found on planets.
The interferometer is also unable to detect various objective-specific stations. Several of the stars involved in objectives appear to be empty in the interferometer report, even though there is in fact a station in orbit around the star.
Ecosystem Modules[]
Cryonics[]


- Built using: 3 1
- Dismantling yields: 1
- Repaired using: 1
Cryonics is a technology known to the player at the start of the game, but it is not a core technology (i.e., unlike the other five technologies known at the start of the game, Cryonics can be erased/forgotten).
In the tutorial, the player's ship initially has a Cryonics module installed, but the player must dismantle it to scavenge its Silicon and build a Space Folder. This happens because the Cryonics module no longer serves any purpose — unless a Shared Cryonics module is also installed, Cryonics provides no benefit to the ship.
[]


- Built using: 1 1 1
- Dismantling yields: 1
- Repaired using: 1
Installing a Shared Cryonics module decreases a ship's oxygen consumption and improves the ship's ecosystem rating, but only if a Cryonics module is also installed.
The primary effect of cryonics is to decrease oxygen consumption on all trips (interstellar, interplanetary, and when taking off from planets). Oxygen consumption is reduced by 33% if the Shared Cryonics module is adjacent to the Cryonics module; otherwise, oxygen consumption is reduced by 25%. Note that the final oxygen consumption values are always rounded up, and therefore oxygen consumption improvements may not be noticeable on short-distance trips (e.g., travel between planets). However, oxygen usage is visibly reduced on maximum-distance interstellar jumps. See Ecosystem for details on how oxygen consumption is calculated.
On the ship summary, the ship's ecosystem rating is typically increased by 3 points if adjacent, or 2 points otherwise, but the details of the ecoystem rating are not relevant for oxygen consumption and may actually be misleading. For example, on the Cristal ship, the ecosystem rating is 6 with a Shared Cryonics module, regardless of whether or not the module is adjacent to the Cryonics module — but oxygen consumption is in fact better when the modules are adjacent. Also, Shared Cryonics improves oxygen consumption even on ships with the maximum Ecosystem rating of 10.
As of Out There: Alliance, Shared Cryonics works on all ships (a possible bug preventing it from working on Life Tree ships in earlier versions has been fixed).
Power Modules[]
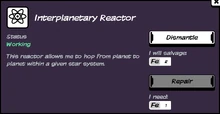
Interplanetary Reactor[]


- Built using: 3
- Dismantling yields: 2
- Repaired using: 1
Interplanetary Reactor is the core technology that allows a ship to travel within a star system, i.e., to travel between planets (including space ships and space stations), and to landon planets. Strictly speaking, it is not needed when jumping between star systems, but without an interplanetary reactor a ship will be stranded at the edge of the new star system after the jump is completed.
The ship's Power rating indicates how much fuel is consumed by the Interplanetary Reactor. It is controlled by the type of ship and how many of the five power-related upgrades are installed. See Power for details.
Space Folder[]


- Built using: 3 1
- Dismantling yields: 2
- Repaired using: 1
Space Folder is a core technology that allows a ship to jump between star systems (but is not needed for travel between planets).
By itself, a Space Folder only allows relative short interstellar jumps. This jump distance is the same on all space ships, regardless of the ship's base power rating. The initial jump distance is sufficient in regions where stars are relatively dense (i.e., the start of the game), but to progress further on the map (especially to complete any Objectives), one or more upgrades will be needed.
If the maximum jump distance using only a Space Folder is defined to be 1 IU (Interstellar Unit), the effect of the possible upgrade modules on jump distance are:
- Subspace Reactor: +0.6 IU (adjacency has no effect)
- Tau Stasis: +1.6 IU if adjacent to Space Folder; +0.8 IU otherwise
- Gravitational Well Generator: +1.6 IU if adjacent to Space Folder; +1.0 IU otherwise
These upgrades stack, so the maximum possible jump distance is 4.8 IU.
The ship's Power rating indicates how much fuel is consumed by the Space Folder during interstellar jumps. It is controlled by the type of ship and how many of the five power-related upgrades are installed. See Power for details.
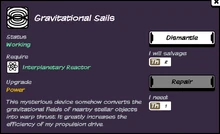
Gravitational Sails[]


- Built using: 4
- Dismantling yields: 2
- Repaired using: 1
Installing Gravitational Sails reduces the ship's fuel usage by 25%. Contrary to the in-game description, Gravitational Sails improve fuel usage when travelling between stars as well as during interplanetary travel.
Installing Gravitational Sails adjacent to the Interplanetary Reactor causes a blue animation, but adjacency has no other observable impact — fuel usage in particular is unaffected. Technically, Gravitational Sails do not even require an Interplanetary Reactor; they improve interstellar fuel usage even if no Interplanetary Reactor is installed.
Gravitational Sails are the most effective module for improving fuel usage: they decrease fuel usage by 25%, whereas every other module only has a 20% effect. However, they do not have any secondary effect, such as increasing the Space Folder jump distance.
The improved fuel usage causes the ship's power rating to increase by 1-2 bars. The magnitude of the power rating change is determined by other details of the ship configuration, and does not reflect any variation in the effectiveness of the Gravitational Sails — the fuel usage decrease is the same in all cases.
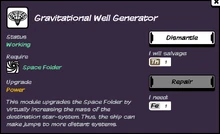
Gravitational Well Generator[]


- Built using: 3 1 1
- Dismantling yields: 1
- Repaired using: 1
Installing a Gravitational Well Generator reduces the ship's fuel usage by 20% and increases the interstellar jump distance. It improves fuel usage for all trips, both interstellar and interplanetary (although they only improve interplanetary fuel usage if a Space Folder is installed).
The maximum jump distance is increased by 1.6 IU if the Gravitational Well Generator is installed adjacent to the Space Folder, or 1.0 IU otherwise. (Where 1 IU is defined as the jump distance possible using only a Space Folder). Note that adjacency only improves the jump distance — it has no effect on fuel usage.
On space ships where adjacency is possible, a Gravitational Well Generator and a Tau Stasis module have the exact same effect. Otherwise, a Gravitational Well Generator is slightly more powerful than a Tau Stasis module, making it the most powerful Space Folder upgrade overall.
The improved fuel usage causes the ship's power rating to increase by 1-2 bars. The magnitude of the power rating change is determined by other details of the ship configuration, and does not reflect any variation in the effectiveness of the Gravitational Well Generator — the fuel usage decrease is the same in all cases, and jump distance improvements are irrelevant for the ship's power rating.
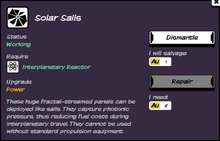
Solar Sails[]


- Built using: 2
- Dismantling yields: 1
- Repaired using: 2 (Note: repairing Solar Sails actually wastes resources. As long as you have learned the technology, it costs less gold (only 1 unit) to destroy the damaged sails (recovering 1 Gold) and then rebuild them.)
Installing Solar Sails reduces the ship's fuel usage by 20%. Contrary to the in-game description, Solar Sails improve fuel usage when travelling between stars as well as during interplanetary travel.
Installing Solar Sails adjacent to the Interplanetary Reactor causes a blue animation, but adjacency has no other observable impact — fuel usage in particular is unaffected. Technically, Solar Sails do not even require an Interplanetary Reactor; they improve interstellar fuel usage even if no Interplanetary Reactor is installed.
Solar Sails are the least useful power upgrade overall — their effect on fuel usage is less (20% vs 25%) than Gravitational Sails, plus there is no secondary effect, such as increasing the Space Folder jump distance.
The improved fuel usage causes the ship's displayed power rating to increase by 1-2 bars. The magnitude of the power rating change is determined by other details of the ship configuration, and does not reflect any variation in the effectiveness of the Solar Sails — the fuel usage decrease is the same in all cases.
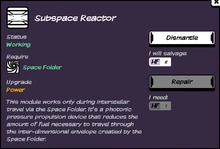
Subspace Reactor[]


- Built using: 4
- Dismantling yields: 2
- Repaired using: 1
Installing a Subspace Reactor reduces the ship's fuel usage by 20% and increases the interstellar jump distance; it can also increase the Telescope range. A Subspace Reactor improves fuel usage for all trips, both interstellar and interplanetary (although it only improves interplanetary fuel usage if a Space Folder is installed).
A Subspace Reactor increases the maximum jump distance by 0.6 IU (where 1 IU is defined as the jump distance possible using only a Space Folder). Unlike the other Space Folder upgrades, placing the Subspace Reactor adjacent to the Space Folder has no impact on the jump distance. Instead, adjacency increases the range of the Telescope by 1 IU (whereas when non-adjacent, a Subspace Reactor has no effect on the Telescope).
The Subspace Reactor is the weakest of the three available Space Folder upgrades, although its secondary effect on Telescope range can be advantageous in some situations (especially if relying heaving on wormhole jumps for travel).
The improved fuel usage causes the ship's power rating to increase by 1-2 bars. The magnitude of the power rating change is determined by other details of the ship configuration, and does not reflect any variation in the effectiveness of the Subspace Reactor — the fuel usage decrease and jump distance improvement is the same in all cases.
Tau Stasis[]


- Built using: 6
- Dismantling yields: 1
- Repaired using: 1
Installing a Tau Stasis module reduces the ship's fuel usage by 20% and increases the interstellar jump distance. It improves fuel usage for all trips, both interstellar and interplanetary (although it only improves interplanetary fuel usage if a Space Folder is installed).
The maximum jump distance is increased by 1.6 IU if the Gravitational Well Generator is installed adjacent to the Space Folder, or 0.8 IU otherwise. (Where 1 IU is defined as the jump distance possible using only a Space Folder). Note that adjacency only improves the jump distance — it has no effect on fuel usage.
On space ships where adjacency is possible, a Tau Stasis module and a Gravitational Well Generator have the exact same effect. Otherwise, a Tau Stasis module is slightly weaker than a Gravitational Well Generator, making it fall in the middle of the three available Space Folder upgrades.
The improved fuel usage causes the ship's power rating to increase by 1-2 bars. The magnitude of the power rating change is determined by other details of the ship configuration, and does not reflect any variation in the effectiveness of the Tau Statsis module — the fuel usage decrease is the same in all cases, and jump distance improvements are irrelevant for the ship's power rating.
Resistance Modules[]
Shield Generator[]


- Built using: 2 2 2
- Dismantling yields: 1
- Repaired using: 2 1
Installing a Shield Generator module increases the resistance rating of the ship, reducing the amount of hull damage that occurs when landing on Garden Planets, going into orbit around Gas Giant Planets, or going into orbit around stars and black holes. Shield Generators (and resistance in general) have no effect on damage incurred during Random Encounters.
A Shield Generator decreases all hull damage by 50%, without any upgrade modules. It has three upgrade modules, all of which are more effective if they are installed adjacent to the Shield Generator:
- A Supra-Conductor further decreases damage by 50%, but only if it is adjacent (otherwise it has no effect)
- A Void Fluctuation Projector further decreases damage by 39% if it is adjacent, or 33% otherwise.
- A Thermal Resonance Generator further decreases damage by 27% if it is adjacent, or 20% otherwise.
These effects stack, so the maximum possible effect is a 89% decrease in hull damage. (Damage is multiplied by 0.1113, where 0.1113 = 0.5 × 0.5 × 0.61 × 0.73). See Resistance for more details on how hull damage is calculated.
Note that Shield Generator is not a core technology: the player initially does not know how to build a Shield Generator.
The Shield Generator is the only module that, when dismantled, yields resources that are completely unrelated to those used to build the module. This is potentially useful in emergencies: if a ship's Space Folder is destroyed and no Silicon is available to rebuild it, dismantling a Shield Generator can be a last resort. It is even possible to build a Shield Generator just to dismantle it and alchemically transmute other elements into Silicon).
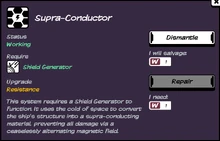
Supra-Conductor[]


- Built using: 3
- Dismantling yields: 1
- Repaired using: 1
Installing a Supra-Conductor upgrades a ship's Shield Generator: the ship's resistance rating is increased and the amount of hull damage is further decreased. Unlike most upgrade modules, a Supra-Conductor has no effect unless it is installed adjacent to a Shield Generator — if there is no blue animation shown for the Supra-Conductor module, it is doing nothing.
A Supra-Conductor decreases hull damage by 50%. This decrease combines with the Shield Generator, meaning the overall damage decrease from these two modules is 75%.
The Supra-Conductor is the strongest of the three possible Shield Generator upgrades — but only on ships where adjacency is possible.
The hull damage reductions cause the ship's resistance rating to increase by 2-3 bars. The magnitude of the resistance rating change is determined by other details of the ship configuration, and does not necessarily reflect any variation in the effectiveness of the Supra-Conductor module.
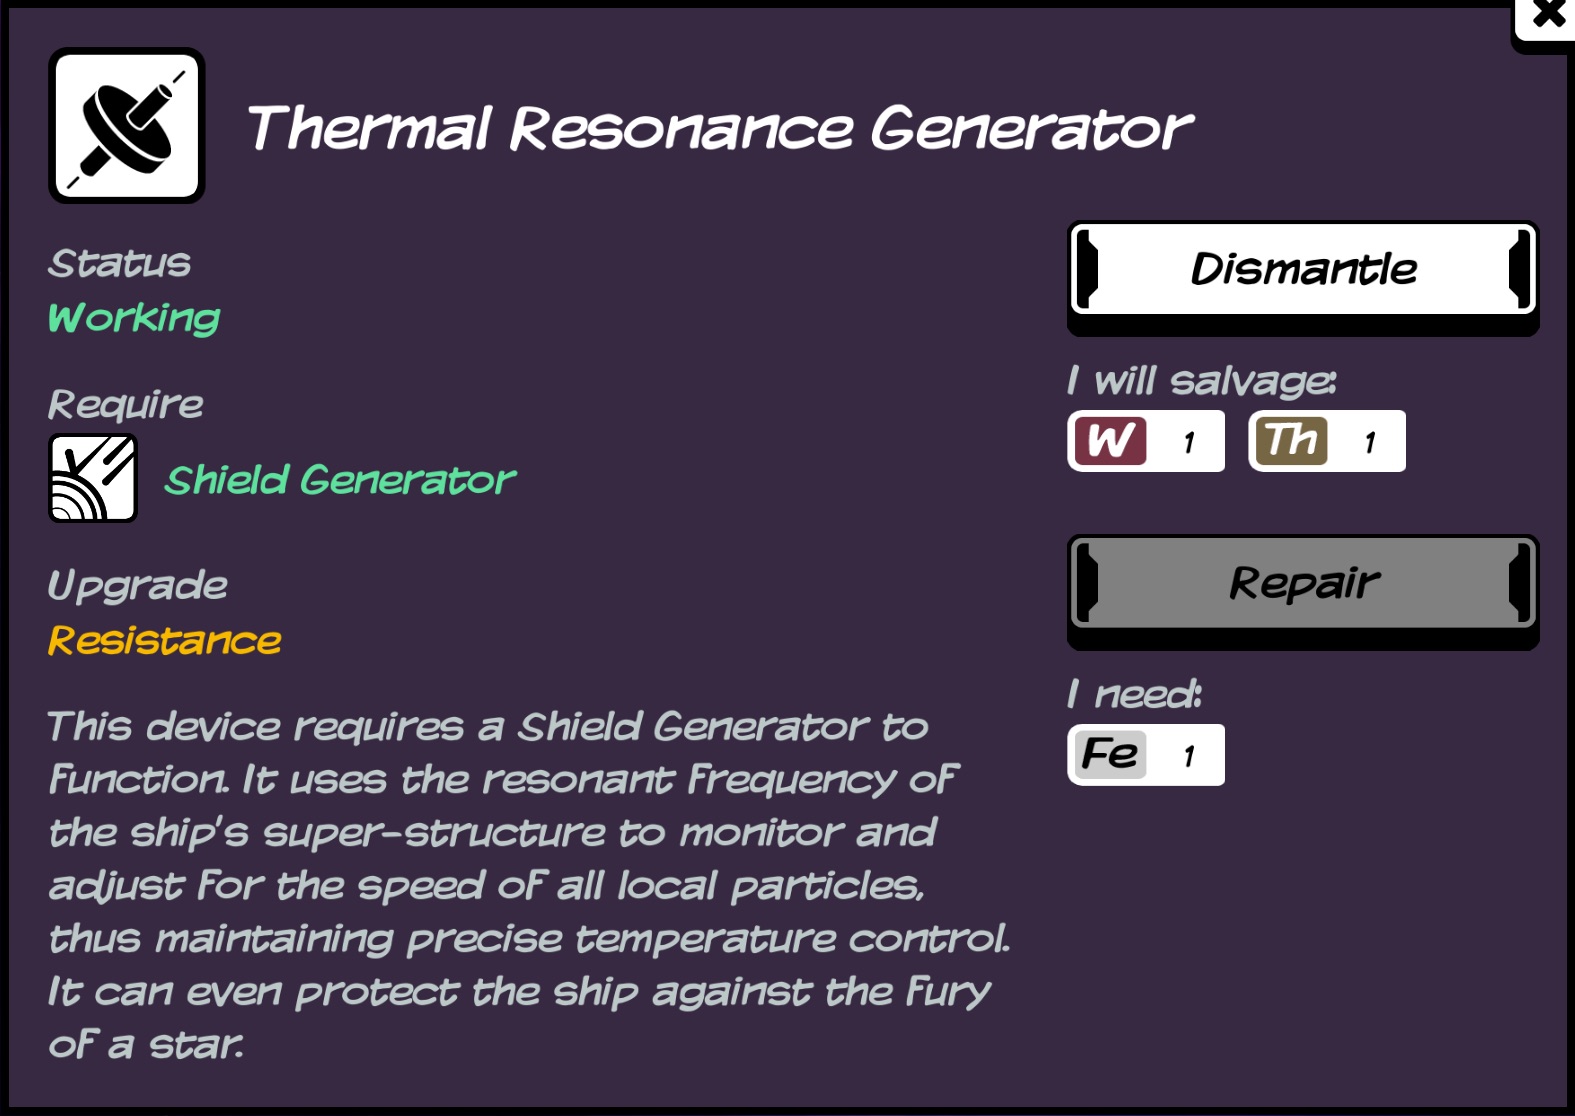
Thermal Resonance Generator[]
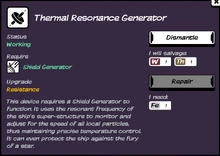

- Built using: 1 1 1
- Dismantling yields: 1 1
- Repaired using: 1
Installing a Thermal Resonance Generator upgrades a ship's Shield Generator: the ship's resistance rating is increased and the amount of hull damage is further decreased. A Thermal Resonance Generator has no effect unless a Shield Generator is also installed.
A Thermal Resonance Generator decreases hull damage by 27% if it is installed adjacent to the Shield Generator; otherwise the hull damage is decreased by 20%. This decrease combines with the Shield Generator, meaning the overall damage decrease from these two modules is 64% (or 60% if non-adjacent).
The Thermal Resonance Generator is the weakest of the three possible Shield Generator upgrades.
The hull damage reductions cause the ship's resistance rating to increase by 2-3 bars. The magnitude of the resistance rating change is determined by other details of the ship configuration, and does not necessarily reflect any variation in the effectiveness of the Thermal Resonance Generator.
Void Fluctuation Projector[]

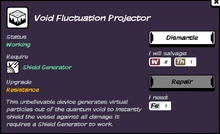

- Built using: 1 2 2
- Dismantling yields: 2 1
- Repaired using: 1
Installing a Void Fluctuation Projector upgrades a ship's Shield Generator: the ship's resistance rating is increased and the amount of hull damage is further decreased. A Void Fluctation Projector has no effect unless a Shield Generator is also installed.
A Void Fluctuation Projector decreases hull damage by 39% if it is installed adjacent to the Shield Generator; otherwise the hull damage is decreased by 33%. This decrease combines with the Shield Generator, meaning the overall damage decrease from these two modules is 67% (or 65% if non-adjacent).
The Void Fluctation Projector is the second-strongest of the three possible Shield Generator upgrades — except on ships where adjacency is impossible, in which case it is the strongest possible upgrade.
The hull damage reductions cause the ship's resistance rating to increase by 2-3 bars. The magnitude of the resistance rating change is determined by other details of the ship configuration, and does not necessarily reflect any variation in the effectiveness of the Void Fluctuation Projector.
Resource Extraction Modules[]
These four modules allow Elements to be extracted from Planets and/or Stars. The mechanics of resource extraction are the same for all modules, and are described at Extracting Elements, including the equations governing extracted amounts, the effect of depth, and events that can happen when drilling/probing.
Drill[]

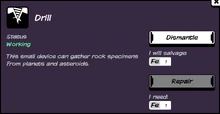

- Built using: 4
- Dismantling yields: 1
- Repaired using: 1
The drill is a core technology used to extract resources from Rocky Planets and Garden Planets. All elements except Hydrogen and Helium are extracted using the drill. See Extracting Elements for details.
A drill can be upgraded by installing a Planetary Expander module.
Hydrogen Probe[]

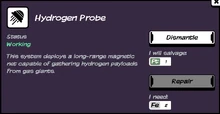

- Built using: 2 1
- Dismantling yields: 1
- Repaired using: 2
The Hydrogen Probe is a core technology used to extract resources from Gas Giant Planets. Only Hydrogen ![]() and Helium
and Helium ![]() are extracted using the hydrogen probe. See Extracting Elements for details.
are extracted using the hydrogen probe. See Extracting Elements for details.
Installing an Ultraprobe module allows Hydrogen and Helium to also be extracted from stars, but does not otherwise upgrade the Hydrogen Probe.
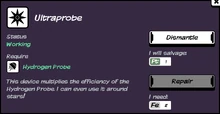
Ultraprobe[]


- Built using: 2 1 1
- Dismantling yields: 1
- Repaired using: 2
Installing an Ultraprobe makes it possible to extract Hydrogen and/or Helium from stars (in addition to Gas Giant Planets). An Ultraprobe can not be used by itself.
Contrary to its description, an Ultraprobe does not improve the efficiency of the Hydrogen Probe — there is no increase in the amount of Hydrogen or Helium obtained from Gas Giant Planets or Stars. Furthermore, adjacency is irrelevant: installing the Ultraprobe next to the Hydrogen Probe has no effect, and does not even result in the standard blue animation.
Note that an Ultraprobe is always damaged/destroyed in place of the Hydrogen Probe if drilling too deep (7-10km) results in equipment damage.
Planetary Expander[]


- Built using: 3 1
- Dismantling yields: 1
- Repaired using: 1
Installing a Planetary Expander increases the quantity of resources obtained when using a Drill, on both Rocky Planets and Garden Planets.
All resource quantities are increased by 80% if the Planetary Expander is installed adjacent to the Drill, or 50% otherwise, i.e., the value of [Planetary Expander Factor] is set to 1.8 or 1.5 in the equation determining the extracted element amounts. All other details of drilling are unaffected, except that a Planetary Expander is always damaged in place of the Drill if drilling too deep (7-10km) results in equipment damage.
In practice, adding a Planetary Expander can be counter-productive: for many elements, the amount of extracted material can be decreased, depending upon the Planet Composition. Even for elements where a Planetary Expander is useful (primarily ![]() and
and ![]() ), there are two distinct, incompatible modes of using it.
), there are two distinct, incompatible modes of using it.
The only way to extract more than 100% of the planet's composition is to drill once with the Planetary Expander to dangerous depths (7-10 km). This single operation empties the planet; repeat drilling is not possible. Enhanced amounts are only guaranteed for the planet's primary element (Iron/Carbon), because the primary element frequently fills nearly all of the six slots on the drilling screen. For example, on a planet with 49 Iron, drilling to 100% yields 89 Iron, which occupies five of the six available slots. Therefore, at most 20 units of one other element are possible, and all other elements are lost.
Alternatively, the Planetary Expander can be used to drill to safe depths (1-6 km). More material can be extracted for a given energy expenditure relative to Drill-only operations, without any risk of equipment damage. However, the chance of hit-or-miss elements (![]() ,
, ![]() ,
, ![]() ,
, ![]() , and
, and ![]() , see
, see [Hit-or-Miss Factor]) is not improved by the presence of the Planetary Expander. In other words, a Planetary Expander at depth=6 may yield approximately the same amount of Iron as Drill-only at depth=10, but other elements are likely to be missed. And those elements may continue to be missed on repeat drilling.
Other Modules[]
Death Seed[]


A solar system before the detonation of a death seed


A solar system after the detonation of a death seed
- Built using: 1 1 1 1
- Dismantling yields: 1 1
- Repaired using: 1
When a Death Seed module is installed, the option "Plant Death Seed" appears whenever a ship goes into orbit around a star.
Planting a death seed costs 1 Omega. The star is collapsed into a black hole (and can be used as a wormhole). Any garden planets in orbit around the star lose their atmosphere and are converted into rocky planets: landing on the planets no longer supplies the ship with oxygen and does not damage the hull. Any life on the planet is destroyed (the option to "Encounter Life" is lost). However, the resources obtained by drilling on the planet are not affected; planting a death seed does not allow iron to be extracted from the planets.
"Stars Destroyed" is one of the statistics shown on the end-of-game summary. The game score is increased by 999 points for each star destroyed.
Life Seed[]


A rocky planet pre-transformation


A rocky planet undergoing transformation


A rocky planet post-transformation
- Built using: 1 1 1
- Dismantling yields: 1
- Repaired using: 1 1
When a Life Seed module is installed, the option to "Terraform" appears whenever a ship goes into orbit around a rocky planet.
Terraforming costs 1 Omega. It adds an oxygen atmosphere to the planet, converting the rocky planet into a garden planet. Landing on the planet will refill the ship's oxygen supply, but will also cause hull damage. Occasionally, the option to "Encounter Life" is even added. However, the resources obtained by drilling the planet are not affected; terraforming a planet does not allow oxygen or carbon to be extracted from it.
Terraforming a rocky planet that contains an unexplored artifact (i.e., if you have never landed on the planet) makes the artifact inaccessible. The Geo Scanner continues to report "Anomaly detected!", but landing on the planet does not allow you to see the artifact or receive a technology. The only way to regain access to the artifact is to plant a Death Seed in the star, converting the planet back to rocky.
"Planets terraformed" is one of the statistics shown on the end-of-game summary. The game score is increased by 999 points for each terraformed planet.
Stellar Embryo[]


- Built using: 1 1 1 1
- Dismantling yields: 1
- Repaired using: Never needs repair
If you are resurrected by a Stellar Embryo, your game resumes at the point where the Embryo was created. The star map, your known technologies, translated glyphs, encountered aliens, etc. are all reset. Your ship contains the modules and resources that were in place at that time, so before building a Stellar Embryo you should first make sure that the ship contains everything required to resume playing.
You can install Stellar Embryos on multiple ships. You will be resurrected at the most recently-built Embryo. Each time you die, you will appear at the next oldest Embryo, until all Stellar Embryos have been used up. Destroying surplus embryos is theoretically possible, but is generally meaningless — the embryos will be recreated as part of the universal reset the next time you get resurrected. Basically, using multiple embryos works, but the results can be surprising.
Another unexpected side-effect of using a Stellar Embryo is that normally-constant map features can be changed. Although the map structure and star types for the entire map are randomly generated at the start of the game, nearly all other map details are randomly generated as necessary during game play. These details include: the number and types of planets found in any star system, the planetary and star compositions, the type and contents of any ships, and the type of any space station. For all stars that were visited before the Stellar Embryo was created, this information should remain the same after being reborn. However, stars first visited after creating the Stellar Embryo are likely to be fully reset when you die; returning to previously resource-rich star systems after resuscitation may instead reveal barren systems.
Stellar Embryos are one of the only modules (along with Symbiotic Extensions) that are never found in discovered ships (even graveyard ships). Stellar Embryo modules are never damaged.
Symbiotic Extension[]


- Built using: 5 5
- Dismantling yields: 1
- Repaired using: 1 (+3-7 )


Storage slots on the Nomad after installing a symbiotic extension; the four extra storage slots are visible on the left.
Installing a Symbiotic Extension adds 3-7 additional storage slots to your ship. The number of slots depends upon the type of ship: 4 is typical, but several small ships have more (up to 7), and the Enemy ship has only 3. Note that on ships with interior "holes" (i.e., City, Life Tree), the extra bays may fill those holes, making them less visible than on other ships. The added bays can only be used for storage; modules can not be installed in these locations.
Symbiotic Extensions can be damaged during Random Encounters. When damaged, everything stored in the Symbiotic Extension is immediately and irreversibly lost (even if the ship had spare storage capacity). Repairing the extension module itself costs 1 Platinum, but the individual storage bays also need to be repaired, at a cost of 1 Platinum per storage bay.
Symbiotic Extension is one of the only modules (along with Stellar Embryo) that is never found installed on standard discovered ships. However, Symbiotic Extension modules can be found on graveyard ships (if you died on a ship where one was installed); all the extension's contents will also be preserved in this case.
Bugs[]
- The Symbiotic Extension module is buggy on Podracer ships. One of the five storage bays (the bottom-most one) does not work properly. Placing or using resources in that location may not work; anything stored there is likely to randomly disappear.
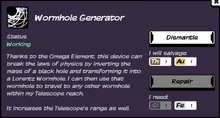
Wormhole Generator[]


The star map as seen while using the wormhole generator
- Built using: 1 1 1 1
- Dismantling yields: 1 1
- Repaired using: 1 1
A Wormhole Generator module allows a ship to travel through a Black Hole to any other black hole within the current range of the telescope, including black holes that have never previously been visited.
Although a Telescope is not listed as a required module, a Wormhole Generator is useless without a Telescope: you can pay 1 Omega to enter a Black Hole, but your only option is to Cancel, re-emerging at the original location. A Wormhole Generator also increases the range of the range of the telescope by 2 IU (regardless of adjacency). Furthermore, the "God-Emperor" achievement ("Build a telescope and its 2 upgrades") requires a Wormhole Generator as the second Telescope upgrade.
Each trip through a black hole costs 1 Omega. No fuel or oxygen is consumed during the trip, although going into orbit around the Black Hole does consume the standard fuel and oxygen for an interplanetary trip, and will also damage the ship's hull.
"Wormhole jumps" is one of the statistics listed in the end-of-game summary. The game score is increased by 999 points for each wormhole jump.