The game map consists of 255 stars, each of which is one of eight types: Black Hole, Blue Giant, Neutron Star, Red Giant, Red Dwarf, Supernova, White Dwarf, or Yellow Dwarf. Red dwarfs and yellow dwarfs are two times more likely than the other six types (on average, red and yellow dwarfs each make up 20% of all stars; each other star type is only 10%).
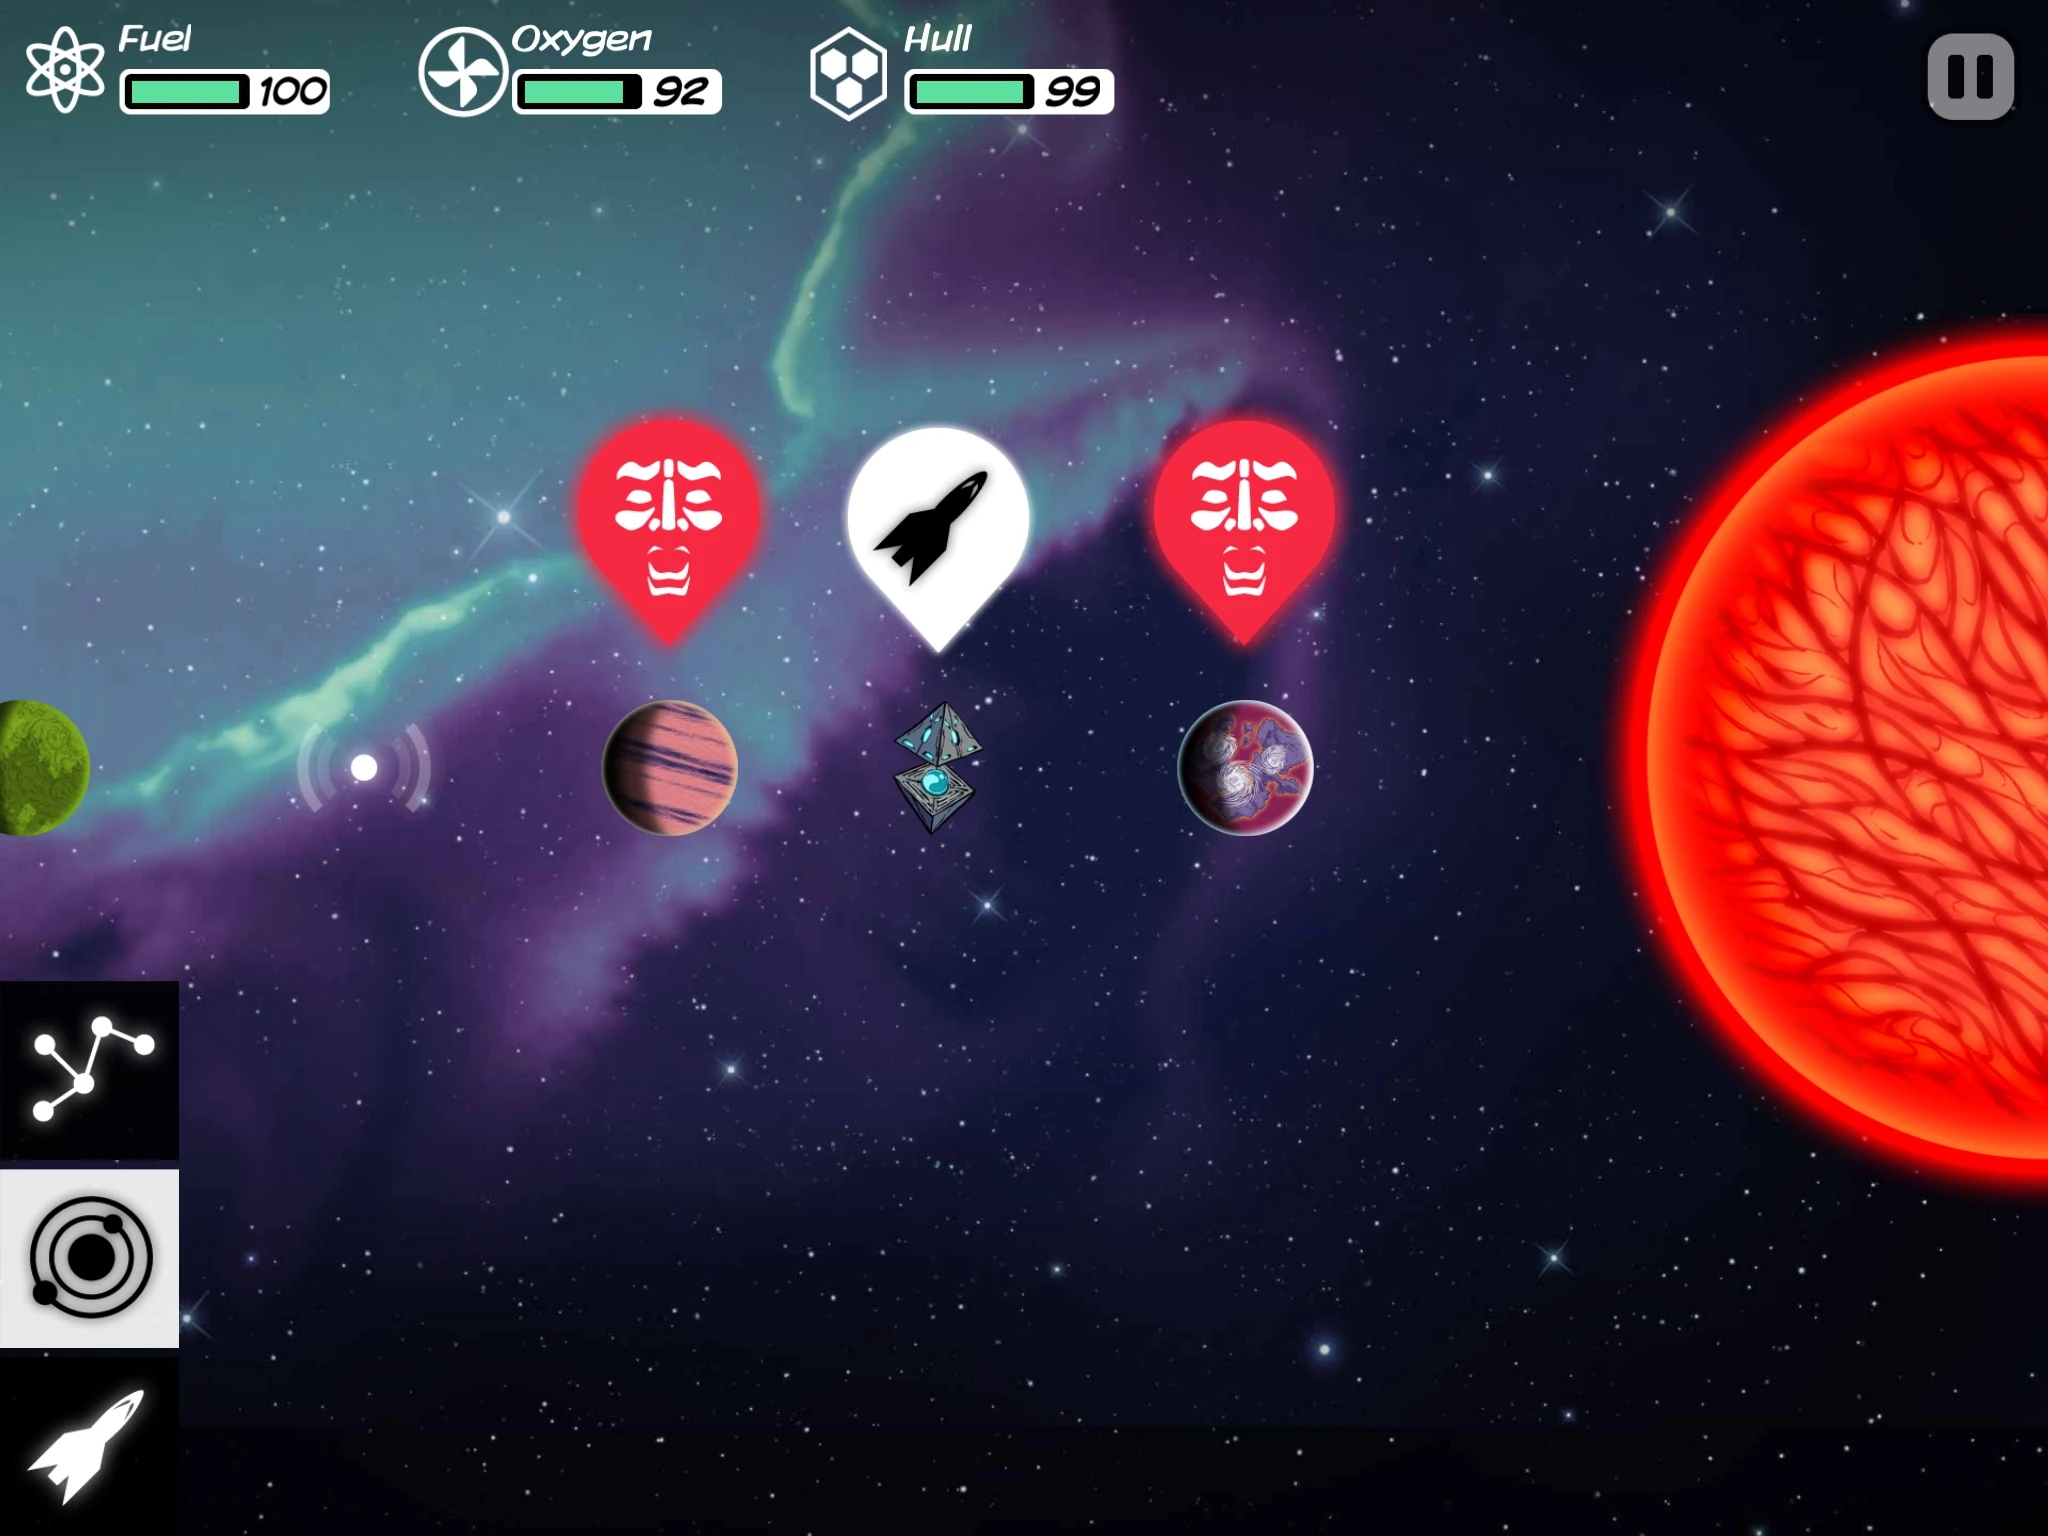
Each star can be orbited by one or more planets, as well as occasional anomalies (Space Stations or Space Ships). The star type influences the type and number of planets in its planetary system.
Star Types[]
Yellow Dwarf[]

A yellow dwarf orbited by 3 garden planets
- Typical planets (45% chance): one garden and two gas giants
- Overall planet chances:
- Garden: 75% chance of 1-3 planets
- Rocky: 30% chance of 1 planet
- Gas Giant: 55% chance of 1-2 planets
- Maximum Hull Damage: 100 (Dangerous Atmosphere)
20% on average of all stars are yellow dwarfs; yellow dwarfs and red dwarfs are twice as common as any other star type.
Yellow dwarfs are the best stars to search for garden planets. 75% of all yellow dwarf stars are orbited by at least one garden planet. Yellow dwarfs are also the only star that can be orbited by more than one garden planet: 15% of yellow dwarfs have three garden planets.
The first two yellow dwarf stars in the game (stars A1 and B1) are atypical. They are always orbited by one rocky planet and one gas giant. No other yellow dwarfs ever have this configuration, and therefore the chance of this configuration in the Planetary Systems table listed as 0%.
Red Dwarf[]
A red dwarf orbited by 2 rocky planets and 1 gas giant
- Typical planets (55% chance): two rocky and one gas giant
- Overall planet chances:
- Garden: never
- Rocky: 85% chance of 1-2 planets
- Gas Giant: 85% chance of 1-2 planets
- Maximum Hull Damage: 50 (Dangerous Atmosphere)
20% on average of all stars are red dwarfs; yellow dwarfs and red dwarfs are twice as common as any other star type.
Red dwarfs are the best type of star to search for rocky planets. Most red dwarf stars are orbited by 2 rocky planets and 1-2 gas giants (making them the only stars that can have 4 planets). They are also the only star type that can have two rocky planets (although red giant stars can have three rocky planets).
They also have a high chance (85%) of being orbited by at least one gas giant, making them the second-best type of star (after blue giants) to search for gas giant planets.
Blue Giant[]

A blue giant orbited by 3 gas giants
- Typical planets (35% chance): one rocky and one gas giant
- Overall planet chances:
- Garden: 20% chance of 1 planet
- Rocky: 85% chance of 1 planet
- Gas Giant: 85% chance of 1-3 planets
- Maximum Hull Damage: 75 (Dangerous Atmosphere)
Blue giants are the best type of star to search for gas giant planets: 85% of all blue giants are orbited by at least one gas giant. In addition, they are the only star that can be orbited by three gas giants (20% chance).
Neutron Star[]


A neutron star orbited by a gas giant and a rocky planet
- Typical planets (35% chance): one rocky and one gas giant
- Overall planet chances:
- Garden: 35% chance of 1 planet
- Rocky: 70% chance of 1 planet
- Gas Giant: 55% chance of 1 planet
- Maximum Hull Damage: 150 (Suicidal Atmosphere)
Neutron Stars are the only star type where maximum hull damage exceeds 100, meaning they are the only stars that can instantaneously destroy even fully-repaired ships (with 100 Hull). To safely enter a Neutron Star's atmosphere, a ship's resistance needs to be 2 or higher.
Another unusual aspect of neutron stars is that the order of gas giants and rocky planets is often reversed around neutron stars. Typically, gas giant planets are closer to the star than other types of planet. However, when neutron stars are orbited by one gas giant and one rocky planet, the rocky planet is located closer to the star than the gas giant.
The Blue Objective star is an atypical neutron star. It is always orbited by three rocky planets. No other neutron stars ever have this configuration, and therefore the chance of this configuration in the Planetary Systems table listed as 0%.
Red Giant[]


A red giant orbited by a garden planet, a rocky planet, and a gas giant
- Typical planets (35% chance): one rocky and one gas giant
- Overall planet chances:
- Garden: 20% chance of 1 planet
- Rocky: 85% chance of 1-3 planets
- Gas Giant: 65% chance of 1 planet
- Maximum Hull Damage: 100 (Dangerous Atmosphere)
Red giants are the only stars that can have three rocky planets (although red dwarfs on average have more rocky planets than red giants).
Supernova[]


A supernova orbited by a gas giant, rocky planet, and garden planet
- Typical planets (35% chance): one garden, one rocky, and one gas giant
- Overall planet chances:
- Garden: 55% chance of 1 planet
- Rocky: 65% chance of 1 planet
- Gas Giant: 65% chance of 1 planet
- Maximum Hull Damage: 100 (Very Dangerous Atmosphere)
Supernovae are the second-best type of star (after yellow dwarfs) to search for garden planets: 55% of all supernovae are orbited by one garden planet. They are also the best all-purpose star, with the highest chance (35%) of having one of each type of planet.
White Dwarf[]


A white dwarf orbited by a single rocky planet
- Typical planets (80% chance): one rocky
- Overall planet chances:
- Garden: never
- Rocky: 80% chance of 1 planet
- Gas Giant: 15% chance of 1 planet
- Maximum Hull Damage: 100 (Suicidal Atmosphere)
White dwarf stars are the only stars with only one planet in orbit. The vast majority (80%) have one rocky planet, but sometimes one gas giant planet is instead present.
Although the atmosphere is described as "Suicidal", it is no worse than the Very Dangerous atmosphere of Supernovae, or the Dangerous Atmosphere of Yellow Dwarfs and Red Giants.
Black Hole[]


A naturally-formed black hole, with an abandoned ship being all that orbits it
- Never orbited by planets
- Maximum Hull Damage: 7.5 (despite being described as a "Dangerous Atmosphere"); damage is not random
Black holes are different from all other stars in several ways.
- The black holes originally found on the map are never orbited by planets.
- Visiting a black hole, even for the first time, never triggers a Random Encounter.
- Black holes cannot be probed to retrieve Hydrogen or Helium.
- Ships that have a working Wormhole Generator can enter black holes and travel between them, at a cost of 1 Omega per trip.


An artificially-formed black hole, orbited by 3 rocky planets that once supported life
Any star on the map can be transformed into a black hole by planting a Death Seed. All orbiting planets and anomalies are retained when a star is converted into a black hole (although garden planets lose their atmospheres and become rocky planets; also all enemies occupying planets are removed). The presence of orbiting planets is the only difference between death-seed-created black holes and and natural ones.
Planetary Systems[]
Every star has a planetary system containing 0-4 planets, and possibly a space ship and/or a space station. The types of planet in a planetary system are randomly determined based on the star type. Each star type has a list of allowed planetary configurations, with varying likelihoods. The existence of anomalies (space ship and/or space station) is unrelated to star type, as is the chance that planets are occupied by the enemy.
This table summarizes all the possible planetary systems, and their chances of appearing at each star type. Black holes are excluded from the table because they never have orbiting planets (at least not the naturally-occuring black holes that are initially present on the map).
| Planet Numbers/Type | Red Dwarf | Yellow Dwarf | Blue Giant | Neutron | Red Giant | Supernova | White Dwarf | |||
|---|---|---|---|---|---|---|---|---|---|---|
| Total | Garden | Rocky | Gas Giant | |||||||
| 0 | 5 | 5 | 5 | 5 | 5 | 5 | 5 | |||
| 1 | 10 | 15 | 10 | 20 | 10 | 10 | 80 | |||
| 1 | 10 | 5 | 10 | 5 | 10 | 10 | 15 | |||
| 1 | 20 | 20 | ||||||||
| 2 | 35 | 35 | 35 | 20 | ||||||
| 2 | 10 | |||||||||
| 3 | 5 | 20 | 15 | 20 | 35 | |||||
| 3 | 55 | |||||||||
| 3 | 45 | |||||||||
| 4 | 20 | |||||||||
| 3 | 20 | |||||||||
| 3 | 20 | |||||||||
| 3 | 15 | |||||||||
Atmosphere of Stars[]
Within the planetary system map, clicking on the star and selecting "Orbit" allows the player's ship to enter the star's atmosphere, or at least its uppermost layers. Entering a star's atmosphere is risky, and is also useless unless the ship has one of three advanced modules: an Ultraprobe, a Death Seed, or (in case of Black Hole), a Wormhole Generator.
| Type | Atmosphere | Max Hull Damage |
|---|---|---|
| Red D. | Dangerous | 50 |
| Yellow D. | Dangerous | 100 |
| Blue G. | Dangerous | 75 |
| Neutron | Suicidal | 150 |
| Red G. | Dangerous | 100 |
| Supernova | Very Dangerous | 100 |
| White D. | Suicidal | 100 |
| Black Hole | Dangerous | 7.5 |
Entering a star's atmosphere always damages the ship's hull (at least one point of damage happens). In the case of black holes, the amount of damage is fixed — similar to entering a garden planet, but the damage is 50% higher. For all other stars, the amount of damage each time is randomly determined — similar to gas giant planets, but the damage is one to three times higher, depending upon star type. The description of the star's atmosphere (Dangerous, Very Dangerous, or Suicidal) is only loosely related to the hull damage. Maxaximum hull damage values (at ΔHull=1) are listed in the table. The ship's Resistance decreases the maximum damage value; the actual damage is any random number less than the resistance-adjusted maximum value (see Resistance for details).
One reason to enter a star's atmosphere is to extract Hydrogen and Helium. All stars other than Black Holes are described as "Rich in Fuel" and contain a predetermined, random amount of each element:
- Stars always contain hydrogen; amount varies from 10 to 49
 .
. - Stars have a 50% chance of containing helium; amount varies from 11 to 20 .
These chances and amounts are not dependent upon the star type. A Geo Scanner can be used to survey the (approximate) star composition, but only after entering the star's atmosphere.
Extracting Hydrogen and Helium requires both a Hydrogen Probe and an Ultraprobe. Note that the Ultraprobe does not increase the extracted amounts. Therefore even though more equipment and ship damage is necessary, the amount of extracted fuel on average is no different from what can be extracted from gas giants. In fact stars will often yield less fuel than ringed gas giants (which always contain helium).
Star Layout[]


Map illustrating how the stars are arranged in six strings. This enables predictions of the locations of space ships (circles at F2, D6, B10, A8, and C4) and space stations (squares at C2, C5, C8).
The star map is semi-randomly generated at the start of each new game. However, the basic structure of the map is always the same, and learning to recognize the overall layout of the stars allows the locations of space ships and space stations to be predicted.
The stars are always arranged in six strings, identified here as A, B, C, D, E, and F. Each string zigzags diagonally across the map, from the upper left to the lower right. Strings A and B are the central pair of strings. They are flanked by strings C and D, then the outermost two strings are E and F.
Listed from top to bottom, the overall order of the strings is E, C, A, B, D, F. However, as the strings zigzag across the map, they may cross over adjacent strings, meaning that at times D-string stars can be located above B-string stars, for example. Sometimes stars from adjacent strings are at nearly the same position and look like a binary star system. Selecting each of the two colocated stars can be tricky, but normally is possible with careful clicking. But in extreme cases, two stars can be in the exact same location and it is completely impossible to access the second star.
Each string contains 42 stars, except for string F which contains 44 stars. Including the initial star (I), this adds up to 255 total stars.
Internally the game lists the stars in the order: I, A1, B1, C1, D1, E1, F1, A2, B2, C2, D2, E2, F2, A3, etc. This is the order used when calculating Warped... Out There jumps.
Various items in the game are always placed at the same, fixed stars. Most notably, space stations and random space ships are always found in specific stars. In addition, all the objective destinations are located at fixed stars; nearly all details of these star systems (star type, number and type of planets, etc.) are always the same.
Non-Random Stars[]
Most of the stars (245 of the 255 stars) on the map are randomly generated: the star type is assigned at the start of the game; the number and type of planets, plus the composition of the planets is randomly determined as necessary during gameplay.
However, there are ten non-random stars -- stars whose location and type are the same in every game. This includes the first three stars in the game as well as all stars related to the game objectives.
- I: The initial star, where the game starts, is always a red dwarf, orbited by one space station but no planets. The space station type (oxygen, fuel, or hull) is random.
- A1 and B1: Two yellow dwarf stars are always located closest to the initial star, at a fixed distance that is well within range of the Space Folder. These two yellow dwarfs are always orbited by one rocky planet and one gas giant planet (even though no other yellow dwarfs ever have this planetary configuration). The elements (and amounts) found on the planets are random.
- D17: The Orange Objective star is always a neutron star with no orbiting planets. One station orbits the star, but this station is not detected by the Interferometer, which says that the system is completely empty.
- B34: The Blue Objective star is always a neutron star orbited by three rocky planets, all of which are occupied by the enemy.
- F30: The Green Objective star is always a yellow dwarf star with no orbiting planets. The Star Iron station orbits the star, but this station is not detected by the Interferometer, which says that the system is completely empty.
- F40: The Red Objective star is always a red dwarf star with no orbiting planets. A station orbits the star which looks like a standard space station, but is in fact a special station that is not detected by the interferometer.
- F43: A black hole orbited by one space ship. Although this star is not itself the destination for the Yellow Objective, it is a non-random star because it is critical for completing the objective.
- F44: The Yellow Objective star is always a yellow dwarf star, orbited by one rocky planet which always contains 10 Carbon, 10 Oxygen, and 10 Platinum.
Warped... Out There[]
Various Random Encounters can cause your ship to be "Warped... Out There". When this occurs, a distance is determined, typically as a random value within a given range (e.g., from -15 to +15). Your ship is then moved that distance, as a number of stars, "forwards" (if the distance is positive) or "backwards" (if the distance is negative), relative to the intended destination star. The distances are applied based on the game's internal order for the stars, which is always: I, A1, B1, C1, D1, E1, F1, A2, B2, C2, etc.
Warping "backwards" may imply that your ship is moved closer to the initial star, but on the in-game map map, you can actually travel in nearly any direction. Warp directions are most counter-intuitive when you are moved between the innermost strings (A, B) and the outermost strings (E, F), because the stars in the outer strings are effectively offset relative to the inner strings: E1 and F1 are much further from the initial star than A1 and B1, or even A2, A3, A4, B2, B3, and B4. Therefore travelling from A4 to E1, for example, is considered to be a large backwards jump (warp distance of -14) but in-game your ship is moved to the right, away from the initial star, and into a more remote part of the map.
Also, the warp distance is selected without taking into account which stars have or have not been visited. Therefore "backwards" does not mean that your ship is going to be moved to a previously-visited star.
It is possible for the warp distance to be zero (e.g., if the distance is a random value from -15 to +15, the result is 0 3% of the time), in which case your ship is not moved and you end up at your intended destination star.
Locations of Space Stations[]
Space stations are placed every nine stars, starting at the initial star (I), resulting in a total of 28 space stations.
Because of the map structure, all the space stations other than the first one are found in strings C and F, at every third star along those strings:
- String C (second string from the top): C2, C5, C8, C11, C14, C17*, C20, C23, C26, C29, C32, C35, C38, C41
- The star at C17 contains a ship in addition to a space station
- String F (bottom string): F3, F6, F9, F12, F15, F18, F21, F24, F27, F33*, F36, F39, F42
- The star at F33 contains a ship in addition to a space station
- Note that F30 is an exception: it does not have a space station, but rather is the Green Objective Star
Note that two of these space stations (C17 and F33) are found in star systems that also contain a random space ship. (Equivalently, every ninth star on the map has a space station: 1, 10, 19, etc.)
Locations of Space Ships[]
Random space ships are found every eleven stars, starting from the 12th star (E2), resulting in 23 space ships. This list does not include graveyard ships created by previous failed games — graveyard ships are found at the star where you died (i.e., at any star), and exist in addition to the 23 random ships.
The ship locations, ordered by string, are:
- String A has 3 ships: A10, A21, and A32.
- String B has 4 ships: B8, B19, B30, and B41.
- String C has 4 ships: C6, C17*, C28, and C39. (C17 has both a ship and a space station).
- String D has 4 ships: D4, D15, D26, D37.
- String E has 4 ships: E2, E13, E24, and E35.
- String F has 4 ships: F11, F22, F33*, and F43. (F33 has both a ship and a space station).